
Adding a scanned signature to a photo
This method will already be well known to a lot of you, but I hope it might be a little "a-ha!" moment to some. This method works exactly the same in all version of Photoshop and Elements.
The idea of placing your own genuine signature on your photos might seem great, but the prospect of cutting out around your scrawl to achieve a transparent background is too daunting, right? Well, luckily you don’t have to.
With a black pen (another dark colour should work too), sign a piece of white paper, then scan it. (If you don’t have a scanner handy, take a good sharp photo of it.) Use a nice high resolution (at least 600ppi), to allow plenty of flexibility to use it at a large size if you want to.
Make sure the white paper scans lovely and white – a shade of light gray is NOT your friend. My scanning software allows me to adjust the levels before scanning, to make sure the white is white. If yours doesn’t do that, you can easily adjust it afterwards with Levels or Curves.
Here’s my scan:

Then I cloned out a few little specks of crap that were on the paper, and got a nice clean siggy:

Then I saved it as a high quality Jpeg file (Level 12) on my hard drive. That part is done – easy!
Using it
Let’s say I want to add my name to this photo of me in my Old Man Hat:

I choose "Place Embedded" from the File menu …
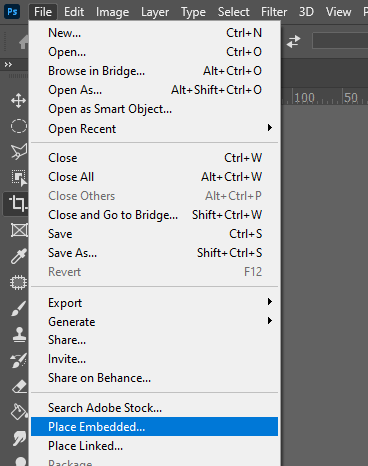
(Just use "Place" if that's what your version of Photoshop or Elements has.)
… and it automatically places it on its own new layer in the centre of the image, with the Transform handles already attached:

Why Place, and not Copy and Paste? Well, for a few reasons, the first of which is the most important – it’s simpler. Once you’ve discovered the joy of Place, you’ll kick yourself for wasting so much of your life clumsily opening images, selecting them, copying them, closing them, and then pasting them. C&P is a mug’s game.
(In fact, there's an even simpler way - just drag and drop the file from Bridge onto your photo!)
Secondly, as you can see, Place automatically gives you the Transform handles, ready to manipulate the image as you need to. And thirdly, Place automatically brings a file in as a Smart Object, which means you can transform it multiple times without any pixel degradation.
Quite simply, Place rocks!
Ok, where was I? Oh yes, I was moving my signature down to the corner, and enlarging it a bit. Now it’s roughly where I want it:

To commit the transformation and remove the Transform handles, I just hit Enter/Return. Now the signature is ready, except for the obvious problem – that white box around it!
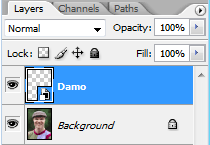
Let’s take a quick look at the Layers Panel now. You can see the signature layer (notice how the Place function automatically names the layer with the file name? Cool!) is sitting above the image layer, and you can see it has that odd little icon in the bottom right corner of its thumbnail, indicating that it’s a Smart Object layer.
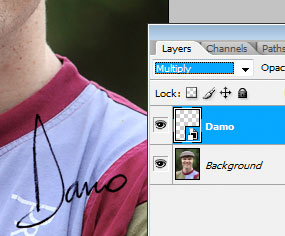
All I need to do is change the layer blend mode to "Multiply". That effectively hides the white box, and, just like magic, my signature is sitting on my photo as if I’d written it there directly:
That’s the trick! Neat, eh? In some cases, the "Darken" mode works better, so try both and see.
Finally, I press Ctrl T to get the Transform handles again, and just resize and move the signature a tiny bit more, until I’m satisfied.

Then I press Enter/Return, and it’s ready to save.