Camera Profile options in ACR and LR
In old versions, we had to dig around in the tabs to find the camera profiles that Adobe provide to us for our images. Nowadays, thank goodness, it's right there in our face when we open a raw file.
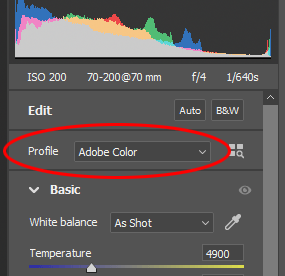
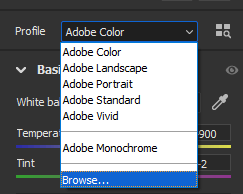
The profiles are different ways of interpreting the colour of raw files. Most people leave it on the default setting of "Adobe Color" and are perfectly happy.
But I encourage you to spend some time exploring, to see if one of the other settings makes you even happier. There are five main ones available at a click:
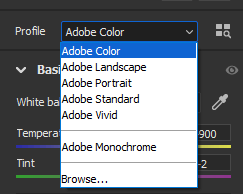
And (if your Photoshop version is the same as mine) there are lots more if you click Browse:
What are you looking for?
Colour rendition that suits your taste and style. Explore the settings on a wide variety of your photos, to see which one consistently looks the nicest.
Maybe you'll find that you like one profile for your studio shots, and another one for your outdoor shots, or whatever. That's ok, but it might get confusing trying to remember to choose the correct one each time. If possible, I'd recommend just picking one setting. Remember, this is just a starting point - you'll still be editing your photos as usual.
Chosen one?
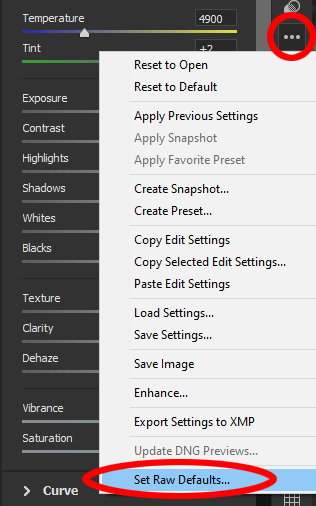
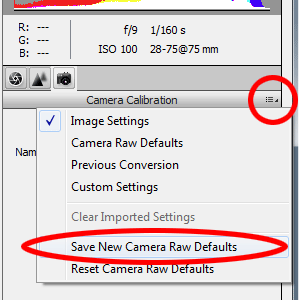
If, after exhaustive testing, you find a profile that you like better than the default one, just choose it and set it as your new default: