
The Handyman Method
Just as it’s nice to have a handyman in the family who can fix leaky taps, change lightbulbs, paint the fence, and various other odd jobs that arise around the house; it’s also nice to have a handy editing method that can take care of all sorts of little image problems when you need it.
The following method is not fancy, nor is it difficult (though it does require a little patience). It’s the kind of method which you might not need for six months, then suddenly need for three photos in a row. Learn it, and keep it in the back of your mind forever. You never know when it will be handy for skin problems, shadow problems, clothing problems, etc. It works exactly the same in both Photoshop and Elements.
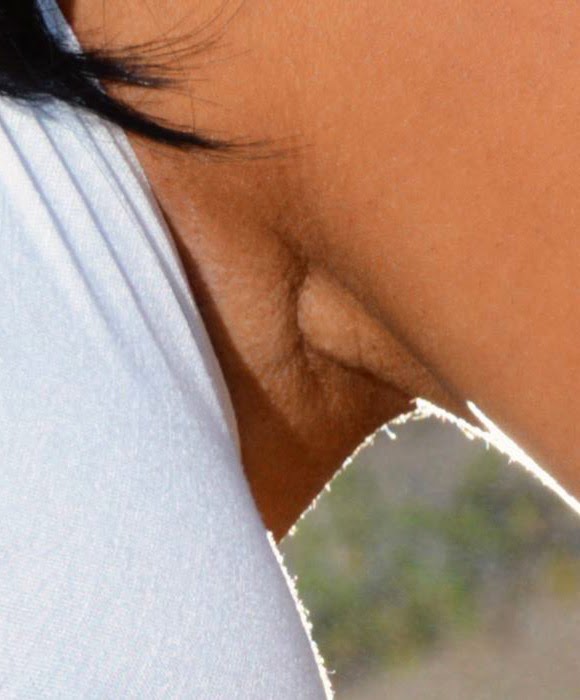
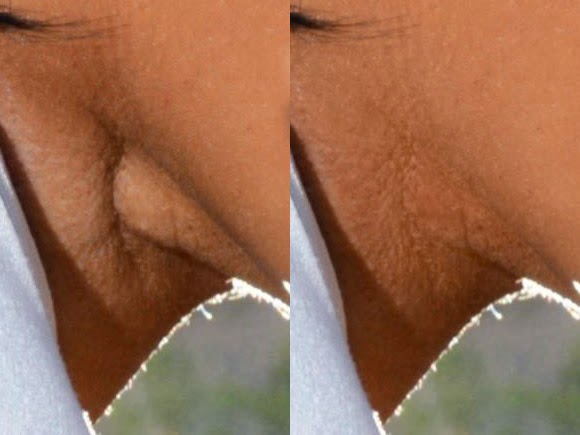
For this demonstration, George Azmy has kindly allowed me to use this small section of a photograph he took. A lovely photo, but a slightly unflattering view of the subject’s armpit, I’m sure you’ll agree:
The "Handyman Method" involves two stages – first, a dodge and burn stage, followed by a colour fix stage.
For the dodge and burn stage, simply add a blank layer and set it to "Soft Light" mode, then paint with either black or white at very low opacity, to darken and lighten areas as needed. See my tutorial about D&B here.
Here’s the before-and-after of the dodging and burning:
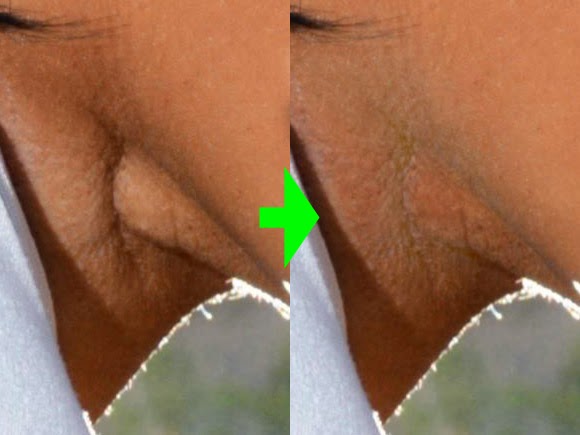
(Important note: The goal of the Handyman Method is always to preserve the natural texture of whatever it is you’re fixing. In cases where you deliberately don’t want to preserve the texture, you’d probably use low-opacity cloning instead.)
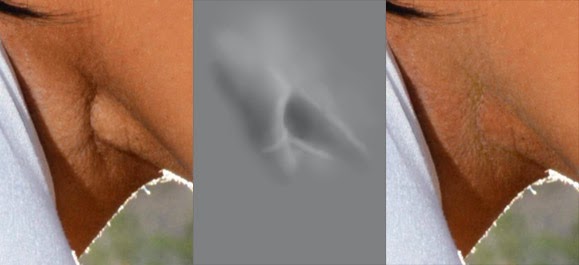
Below, I’ve isolated the view of the dodge and burn layer by itself, so you can see how it evened out the tones by lightening dark areas and darkening the light ones. I did this with a 5% opacity brush. For some more complex work, I use 3%, or even 2%.
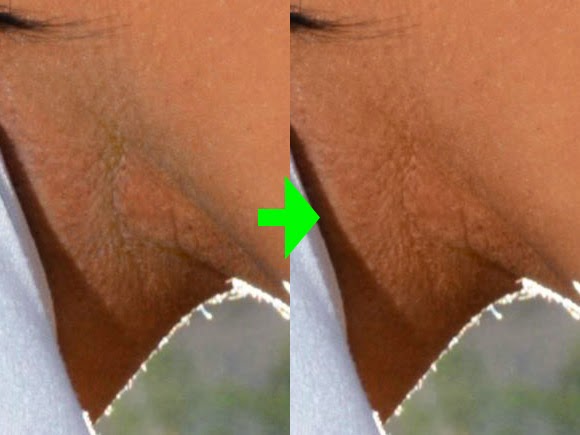
The above fix is ok, but I’m sure you can see the problem. Even though the dodged and burned areas are now the right darkness/lightness, they’re kinda dull gray-ish, aren’t they? That’s why we need the next stage – the colour fix stage.
Add another blank layer, and this time set it to "Color" mode:

Then (again at low opacity) paint nearby good colour onto the problem areas. You can do this one of two ways – either use the Clone Tool to clone the colour, or use the Eyedropper Tool to sample some good colour, then use the Brush Tool to paint it on. In this case, I used the Eyedropper/Brush method:
Here’s a view of the colour fix layer by itself – you can see that it’s quite low opacity painting – a little colour generally goes a long way, so don’t overdo it:
Here’s the final before-and-after, incorporating both the dodge-and-burn stage, and the colour-fix stage:
More examples
Over the years I've demonstrated the Handyman Method in dozens, maybe hundreds, of different situations. Here are just a few:
- Cleaning dirty feet
- Disguising a bald patch
- Reducing a bra line
- Removing a photographer's reflection
- With Liquify for a double chin
- Restoring a lady's modesty
- With Dust & Scratches for dodgy lipstick
- Correcting mild vertilligo
- Fixing mild sun flare
- Blending a pixel edit
- With Levels for glasses glare
- With Dust & Scratches for eczema
- Wiping off smudged makeup
- Minimising veins