
Cropping and printing: the 8×10 problem
Also known as "the 5×7 problem", "the 11×14 problem", "the 16×20 problem", etc …
The Problem:
It’s quite common to hear the lament "When I print my photo at 8×10, part of it gets chopped off!"
The problem is simply understood, when you consider the mathematics. SLR cameras capture images in 2:3 ratio, and compact cameras in 3:4 ratio, neither of which match the 4:5 ratio of an 8×10.
So when you print your photo directly to 8×10, one of two things must occur:
 |
 |
|
Scenario 1The short dimension fits nicely, but the long dimension gets chopped off. |
Scenario 2The long dimension fits nicely, but the short dimension is too short. |
In most cases, we want to avoid Scenario 2, so we must take control of Scenario 1.
Solution 1: Shoot loose
This won’t help you with the card full of tightly-composed photos you took this morning. But from now on, make sure you zoom out just a little bit from your subject, to allow yourself room for cropping later.
Don’t worry, modern cameras give you plenty of pixels to play with, easily enough for an 8×10 and more.
Solution 2: Don’t crop during editing
Resist the temptation to use the crop tool as part of your editing process. Yes, cropping is an integral part of composition, but you’ll find yourself with the same problems as if you’d shot tight.
Save all your pixels, you might need them.
Solution 3: Crop before printing
We know that when your photos are printed on 8×10" paper, something has to be chopped off.
If you send your image ‘as is’ to your printer or lab, it’s probably the exact centre section that will be printed, and an even amount at each end will be lost.
That might be fine most of the time, but sometimes it’s not. So to be safe, it’s good practice to crop your images yourself before printing.
 |
 |
 |
||
|
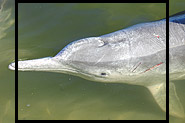
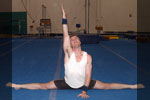
My original photo, from a 2:3 sensor. |
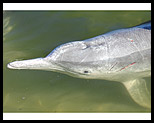
If I let the lab crop automatically, I get more shirt and less hair than I like. |
So I crop to my satisfaction before sending. |
Solution 4: Clone
This is tedious, and doesn’t always work, but it can get you out of a tight situation.
If you didn’t shoot loose enough, you can sometimes add a little extra to the short dimension of your image.
Increase the canvas size, then clone as carefully as you can.
 |
 |
 |
||
|
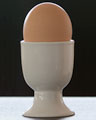
An 8×10 crop will cut the top off my egg. |
I increase the canvas at each side, and clone. |
By adding some pixels to the sides, I’ve turned my 2:3 image into a 4:5 image. Perfect! |
Solution 5: Top-and-bottom borders
In some cases, the photo might lend itself to an artistic border, to fill out the extra space.
 |
 |
|
|
I don’t want to crop, because I’ll lose the feet. |
So I add a decorative border, which enables me to keep the entire image. |
Obviously, this would only work for landscape photos, and should be used sparingly.
Solution 6: Consider a different print size
When an 8×10 just won’t work, what about an 8×12?
If you choose a print size that matches your camera’s aspect ratio, you’ll have less grief.
Common print sizes native to DSLRs:
- 4×6", 6×9", 8×12", 12×18"
Common print sizes native to compact cameras:
- 6x8", 9×12", 12×16"
Solution 7: Custom matting
To fit your odd-sized print into your 8×10 frame, a custom mat might do the trick. Obviously, this will add to the cost of the process, but is a viable option.