
Fixing Skin – acne, scratches, veins and blemishes
Here is the method which I use for most of my skin fixing – pimples, rashes, scratches, etc, etc.
Notes about this tutorial:
- This is not a "skin smoothing" method, nor a "perfect skin" method. I prefer to think of it as a "natural skin" method – it corrects obvious and unflattering skin flaws while leaving everything as natural as possible.
- This is not a cast correction tutorial. Overall tonal and colour corrections must be done first, then minor edits such as acne should be among the last steps in your workflow.
- This method works in all versions of Photoshop and Elements, with only minor variations.
1. The usual stuff
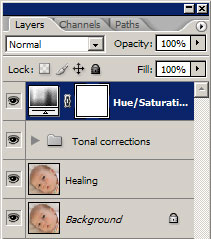
To begin with, I enhance the photo in the normal way. I make my tonal and colour adjustments, mainly using Levels and Hue/Saturation adjustment layers, which I then group together to avoid confusing myself:
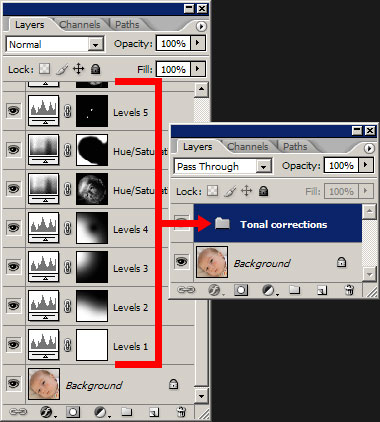
Of course, I can come back and re-adjust those layers later if I desire – that’s the beauty of a layer-based workflow.
2. Make a Healing layer
I return to the Background layer and duplicate it. I name this layer "Healing":
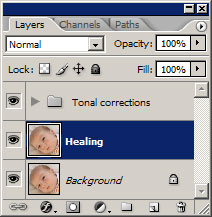
I’ll principally use the Healing Tools on this layer. Sometimes the Clone Tool is necessary, but generally speaking, Healing is much better at maintaining realistic skin texture.
3. What to heal
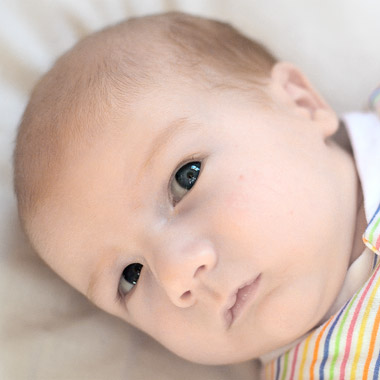
Let’s take a closer look at Rowan’s skin:
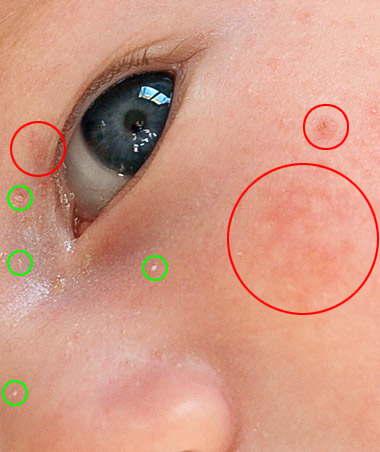
I’m going to Heal the areas where the skin is damaged – mainly flakes and scratches. (See the green circled areas).
I’m NOT going to Heal the discoloured areas (circled in red). In these areas, the texture is absolutely fine, so I don’t want to replace it with false texture. I’ll deal with the discolouration a little later.
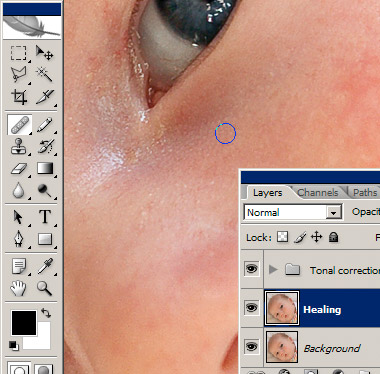
4. Perform the healing
I use my Healing tools to remove the flakes. I use a very small brush – just big enough to fix the problem, and no bigger. Remember, I’m trying to keep as much of the skin texture intact as possible.
5. Make a Discolouration-Fix layer
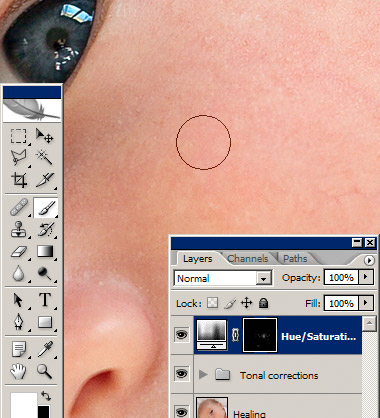
I return to the top of my layer stack, and make a new Hue/Saturation adjustment layer:
I choose Reds, and enter +50 for Saturation, and +75 for Lightness:
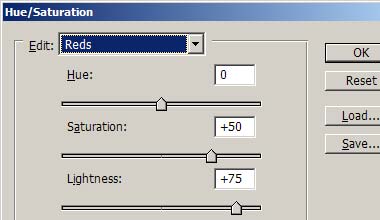
You can adapt those numbers to suit your own images, of course. In some cases I take the Hue slider up to 10 or even 15, and the Saturation up to 55 or 60.
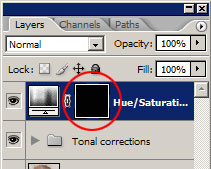
This makes the photo look awful, of course …
… but immediately I press Ctrl I to invert the mask and hide the adjustment:
6. Paint the mask
Now for the magic. I choose my Brush Tool (with a soft edge), and lower the opacity to 5%:

You may choose a higher value. Basically, it’s a trade-off – the higher the percentage, the less painting you need to do, but the less finesse you’ll have. If you want the best result, choose 5%. If you’re in a hurry, choose 10%. If you choose 20% or higher, it’s like hitting your image with a hammer – not subtle at all.
I press D to make sure I’m painting on my mask with white.
Now, I gradually paint over the discoloured red areas. With each click or stroke, the adjustment layer is revealed a tiny bit, and the redness is reduced.
Some mild spots only need a couple of clicks, but worse spots need more.
While I’m painting, my left hand lives on the [ and ] keys on the keyboard, constantly increasing and decreasing the brush size to suit the target area.
Needless to say, a graphics tablet is handy for this type of work. But a mouse can do just as well.
The results
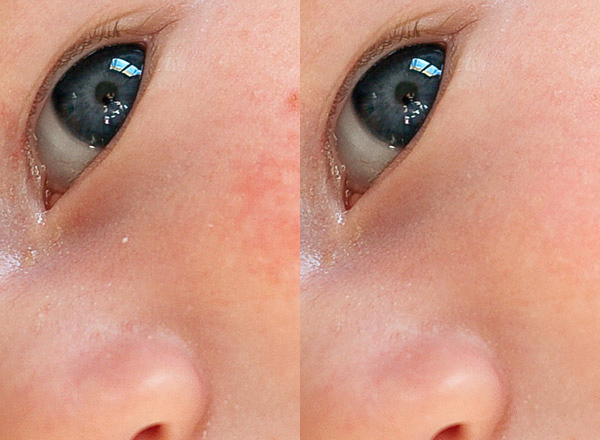
This takes patience, but the results are worth it. See how all the original skin texture is intact, only the redness is removed:
Compare the original on the left to the adjusted image on the right:
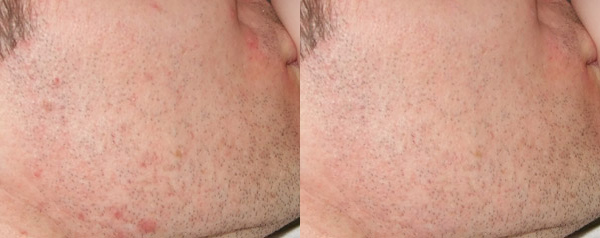
The results are just as good with adult skin:
The advantage of this method
In a word – re-editability. (Is that a real word??)
Every single layer in this workflow can be revisited and re-adjusted, without adversely affecting the others.
I find another flake I forgot to heal? No problem, I just go back to the Healing layer. I decide I want the whole photo lighter? No problem, I just re-visit my Levels layers. Every adjustment works harmoniously with the others.
There are other popular methods, which involves cloning on "Lighten" mode, or painting on "Color" mode, etc. Those methods definitely do NOT offer the same level of flexibility as this one.