
Safely adding noise to an image
This tutorial has been made in Photoshop CS2, but applies to all versions of Photoshop and Photoshop Elements.
Why add noise?
In most cases, we try to remove noise from our images; so it might seem strange that I’m writing a tutorial about adding it.
However, the addition of noise is very important when you’ve artificially created a broad area of very smooth colour to a photo. The two most common examples are (1) adding colour to a blown out sky, and (2) blurring or painting a background in a portrait.
Why is it necessary? Because of banding. When you add or create smooth areas in an image, it’s very common for "stripes" to appear in the image. If you’ve had this happen to you, you’ll know what I’m talking about … if you’ve never seen it, count yourself among the lucky ones.
The way to combat banding is to add a tiny bit of noise to the area. And that’s what I’m about to show you …
Creating and saving a noise pattern
Step 1:
Create a new blank image by going to the File menu and choosing New.
Make it 80×80 pixels in size, in 8-bit RGB colour:
(The Resolution doesn’t matter, and nor does the background colour.)
Step 2:
Next, go to the Edit menu and choose Fill.
Choose 50% Gray.
(Leave the Mode on Normal, and the Opacity on 100%.)
Step 3:
Go to Filter > Noise > Add Noise.
These are the settings I use:
By this stage, your image should be a little, noisy, gray square like this:
Step 4:
Go to Edit > Define Pattern
Name it "Noise" …
… and press OK. Now it is saved in Photoshop’s pattern library, ready for you to use. Easy as that!
Using the noise
For this demonstration, I’m very grateful to Julie from Louisiana for her permission to use this gorgeous shot:
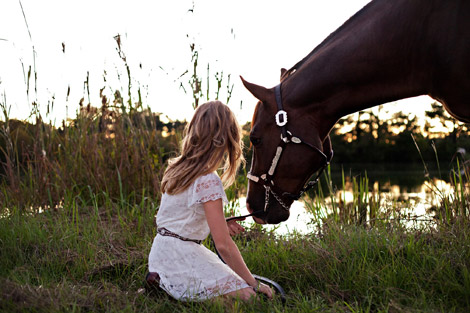
I added a gentle gradient to give a bit of colour to the sky, which the camera wasn’t able to preserve:

I think that looks lovely, but this is a prime candidate for the dreaded banding. If I printed this, there’s a strong chance I’d get those annoying "steps of colour" going down the gradient.
Enter noise, stage left …
Add the layer:
Go to Layer > New Fill Layer > Pattern.
Name the layer (you don’t have to, but it’s good practice in my opinion), set the blend mode to Linear Light, and the Opacity to around 20%. Then press OK:
The first time you do this, your noise pattern won’t be chosen by default. But you just have to click on the little arrow where I’ve indicated, and your noise will probably be the last option:
Select it, and press OK.
Examining the noise
Now you’ll have a new noise pattern layer. At first glance, you won’t be able to see that it has made any difference at all!
In fact, for this example, I had to zoom in to 400% to really see the difference:
Very subtle, you’ll agree. And that’s exactly what we want. We don’t want the noise to be obvious to the viewer – we just need it to "randomise" the gradient very mildly, to prevent banding.
For stronger or weaker noise, simply adjust the layer opacity as needed.
Masking:
Are we finished? No, we’re not. You see, the noise has been added to the whole photo. That’s not what we want. Here’s a close-up of the girl’s arm:
Eeww!! Not nice at all. Obviously we only want the noise applied to the areas that need it.
Of course it’s very simple. Just press Ctrl I to invert the mask and hide the noise altogether …
… then paint with a white brush to apply the noise to the desired areas:
If you’re not familiar with masking, please consider my little class.
It’s easy! Once you’ve made and saved that little pattern, adding some noise is fast and simple. And could save you some serious disappointment from banded prints.