
Preparing a file at the right size for a wrapped canvas
This tutorial has been made in Photoshop CS2, and is relevant to all versions of Photoshop and Photoshop Elements.
Part 1: Get the right info!
If you’re preparing an image for printing on canvas, you need to consider the part of the photo which will wrap around the edges. You have to get it just right, or an important feature of your photo might disappear around the back of the frame!
So in this tutorial, I want to show you one way (of a thousand possible ways, I guess) to prevent nasty surprises.
The method is very simple, but to make it work, you must get these three important pieces of information from your lab:
1. The resolution
Find out the correct pixels per inch that the lab needs to print. It’ll be somewhere around 150PPI. Some labs say 100PPI, some say 200PPI. Some even say 300ppi – I can assure you this is unnecessarily high, but if that’s what they want, well, I guess that’s what you’ll have to give them.
2. The wrap width
How much extra image do they need to wrap around the side and back of the frame? This will depend to a large degree on the thickness of the frame. Sometimes it’ll be one inch, sometimes two inches.
3. The colour space
They’ll ask for either sRGB or Adobe RGB. Or, they might say it doesn’t matter which you choose. Or, they mightn’t know what you’re talking about, in which case run a mile, and choose another lab. (If they happen to tell you to use CMYK, run even faster!)
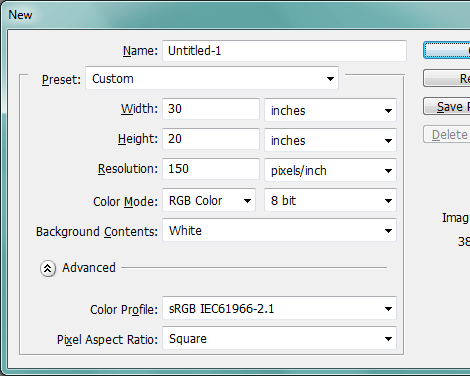
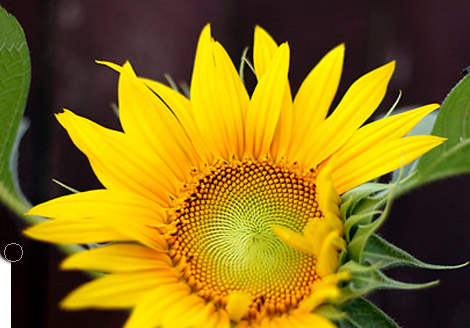
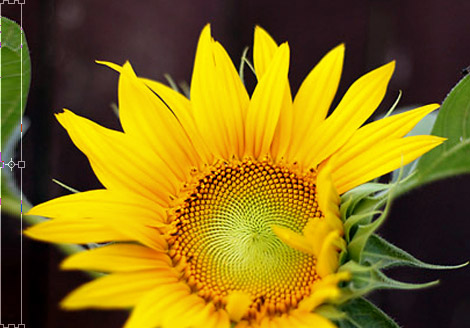
For this tutorial, I’m going to pretend that I want to print a 20×30 inch canvas. I’m going to assume that my lab requires 150PPI, 1.5 inches of bleed for wrapping, and sRGB colour space.
Part 2: Setting up the template
Step 1:
Create a new blank image by going to the File menu and choosing New.
Enter all the necessary info. Enter the width and height of your canvas print (the finished size, I mean – ignore the extra for now); and the resolution and colour profile that your lab advised. Use white as the background colour:
Step 2:
Open the Canvas Size dialog (in the Image menu).
Change the Canvas Extension colour to black, and add the extra wrap size to the height and width. In this example, I’m adding an extra 1.5 inches to each side, which means 3 inches to the overall height and width:
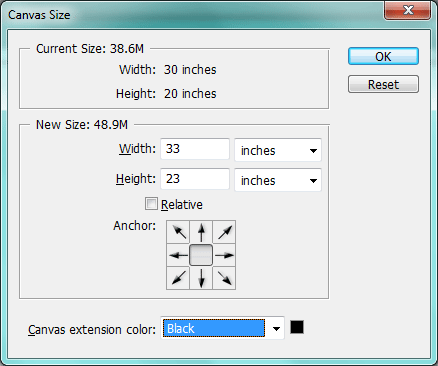
(The canvas extension colour doesn’t have to be black; you could choose red or blue or something. Just not white, that’s all.)
Now the file will look like this – a black border around a white space:

Part 3: Placing the image
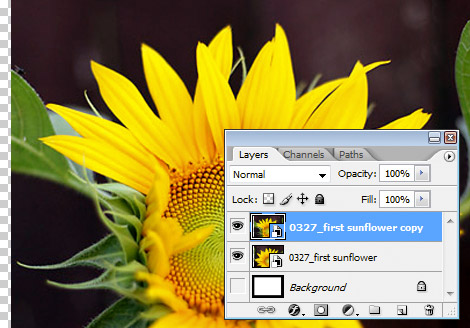
Step 1:
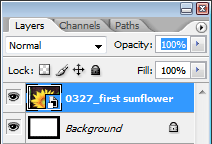
Go to File>Place, and choose your photo. (If you have the option of "Place Linked" or "Place Embedded", choose embedded.)
When it places, it will have the Transform handles active. Immediately press Enter/Return to commit the placement and turn off the handles.
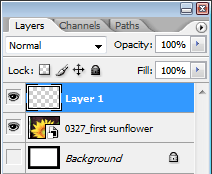
Step 2:
Lower the layer’s opacity to about 70%:
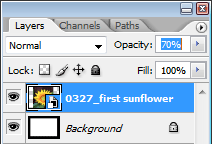
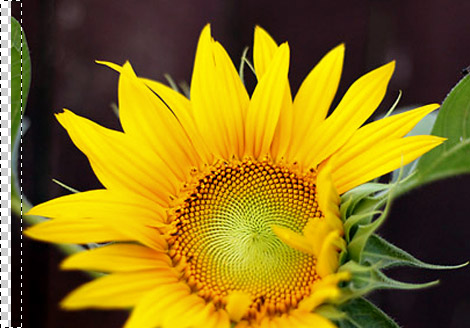
Now you’ll be able to see the bleed area faintly through the image. The dark area around the edge is the part that will be wrapped.
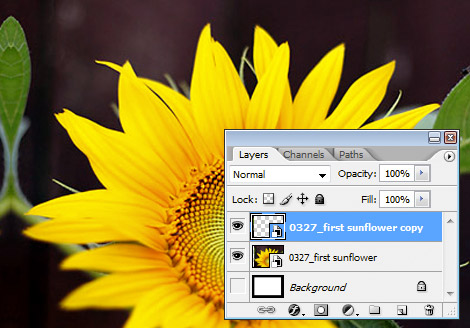
Step 3:
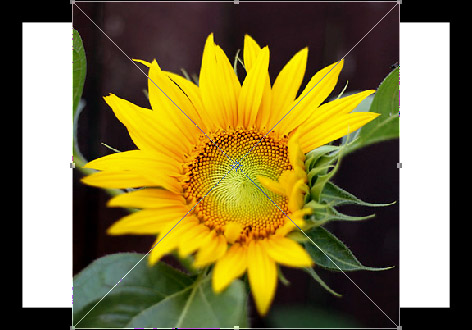
Press Ctrl T to re-enable the Transform handles, and size the image as you wish.
In this example, you can see that I’ve resized the image so that the tips of the petals are "kissing" the edges of the front of the canvas, but won’t quite wrap around. At the top, right and bottom sides I’ve got plenty of image bleeding off. But at the left side, I’m just a bit short, aren’t I? That side will need to be extended (which I’ll discuss in the next section).

Remember you must only resize by the corner handles, and make sure you don’t mess up the proportions. The last thing you need is a squished-up photo.
Press Enter or Return when you’re satisfied with the size and position of the image.
Step 4:
Return the layer opacity to 100%:
Part 4: Extending
If one or more sides need some extending, there are three main methods for doing so. None of the methods are "better" than the others – they all have their uses at different times.
I’ll discuss each method very briefly here, but if you need more in-depth help, please visit me at Ask Damien.
IMPORTANT: Please don’t get too hung up on the quality of your extension. Nobody is ever going to examine it closely. It only has to pass the most fleeting scrutiny. People only pay attention to the wonderful photo on the front of the frame, not what’s at the sides.
Option 1: Cloning
Add a new blank layer:
And clone as necessary:
Option 2: Stretching
Go to Layer>Rasterize>Smart Object, to turn the placed image into a normal pixel layer.
Use the rectangular marquee tool to select as much of the side as you possibly can:
Ctrl J to duplicate that thin section onto its own layer, then Ctrl T to activate the Transform handles. Stretch it to fill the space:
Option 3: Mirroring
Ctrl J to duplicate the image layer, then Edit>Transform>Flip horizontal to mirror it:
Then drag it right across so it mirrors the other layer:
Option 4: Combinations of the above
The truth is, none of the three above options will serve all your needs. Different photos will require different solutions, and in fact some photos require different methods for different sides!
Reminders
1: Shoot loose!
Shooting tightly-composed images in camera will give you grief. Always step back and shoot a little loose. Modern cameras have SO many megapixels, you can easily shoot a bit wide, and never have to worry about the above methods at all.
2: Don’t crop during editing!
Please read my cropping article if you haven't already.
The final steps
Sharpening
Make sure you’ve got the topmost layer selected, then press Ctrl Alt Shift E (Cmd Opt Shift E on a Mac) to make a new combined layer above them all. To that layer, apply your sharpening.
I won’t discuss sharpening at length here, except to say that you can sharpen canvas more aggressively than any other form of output. In fact, good canvas sharpening will frighten the heck out of you the first time. You’ll think it’s too strong, but it’ll look fabulous on your wall.
If you're interested in learning perfect sharpening, my Print Sharpening Class will blow your mind.
Saving the PSD
Save your canvas file as a PSD in case you need to use or adjust it again later. Keep this PSD file at least until you’ve happily received the print.
Saving the Jpeg
Finally, flatten the layers, and save the file as a Jpeg, ready to send to the lab. Level 8 is fine for canvas, honestly, but nobody ever believes me when I tell them that, so I guess you’ll choose 9 or 10 instead. 11 or 12 are completely unnecessary.
Update: Extra fun
I've now written a triptych tutorial. I hope you'll get to try it out!