Channel Mixer to fix a sun flare
I had to fix this photo today:

A gorgeous shot, but there’s an unfortunate red sun flare very prominent.
Luckily, it was a very easy fix, which I thought I’d share here.
This is a job for Channel Mixer. I suspect a lot of people have only used Channel Mixer for black-and-white conversions, if they’ve used it at all. But this kind of problem is just what Channel Mixer was born for.
Here’s a closer look at the area:
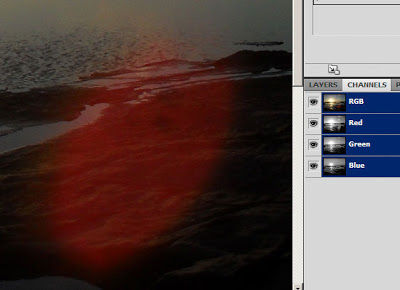
First thing I needed to do was examine the individual channels, to see where the damage was.
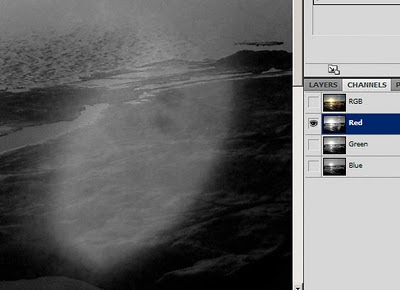
Here’s the Red Channel. You can see it’s cactus:
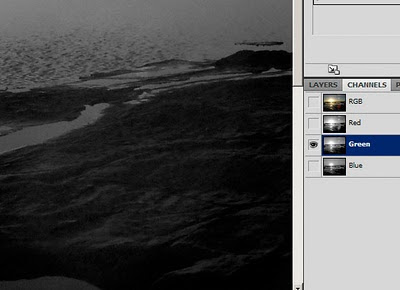
Here’s the Green Channel. It’s looking really good:
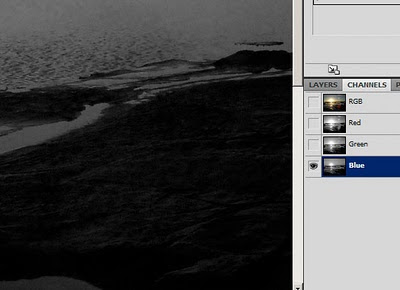
Here’s the Blue Channel. It’s also looking pretty good, but the poor old Blue Channel is always the grainiest of the three, so it’s not ideal:
So, what I needed to do was simply replace the Red Channel with the Green Channel in the problem area.
To begin, I made a rough selection of the area:
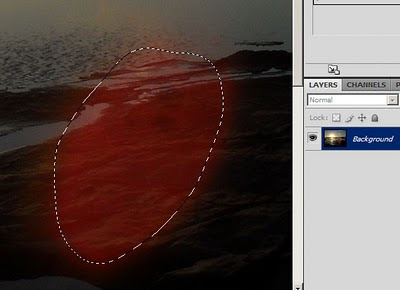
Then I made a Channel Mixer Adjustment Layer. Immediately, of course, my "marching ants" selection was replaced by the layer mask. Channel Mixer opens on Red as the default Output Channel, which was perfect for my needs, because the Red Channel is the one I wanted to fix:
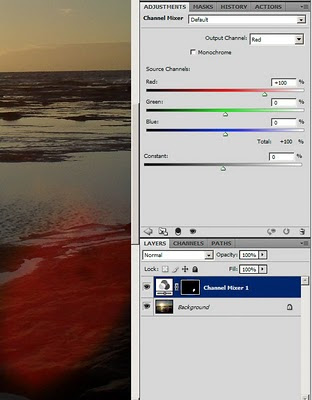
To swap a channel is ridiculously simple. I just reduced the Red slider to 0%, and increased the Green slider to 100%. By doing this, I told Photoshop I wanted the red data to be completely replaced by green data on the target output channel. Take a look at the result:
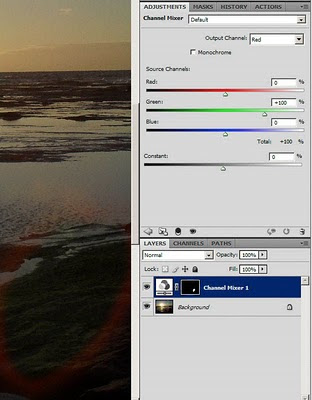
Obviously, I could now see that my mask wasn’t entirely accurate, because there was a red halo around my adjustment. So I carefully painted my mask to ensure all the redness was gone:
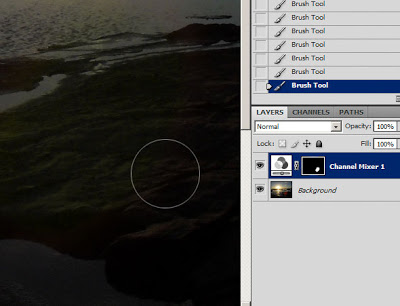
Piece of cake!
To be honest, sun flares are rarely this easy. Usually it’s necessary to adjust two channels, or even all three, and even then there’s cloning to be done, or further colour correction. I was lucky that this one was so easy!
Like to learn more?
My Channel Mixer Class will blow your mind.
