
Blending two exposures
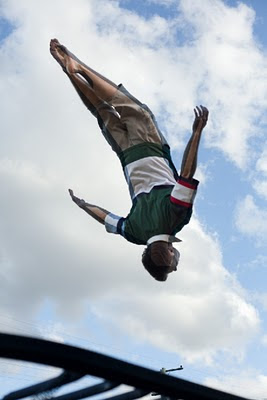
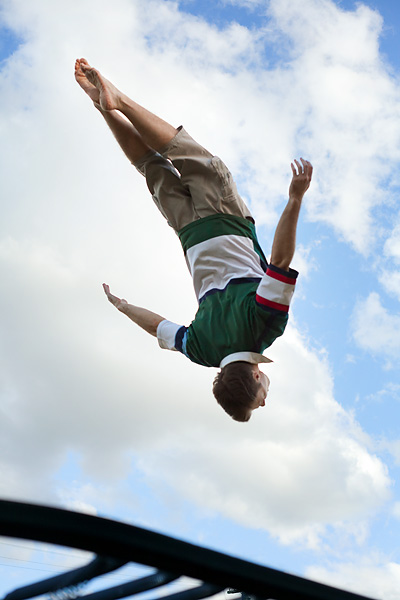
To mark the 6-month anniversary of my ACL reconstruction, I asked my wife to take a few shots of me on the trampoline, demonstrating my renewed confidence in the ol’ knee.
The down-low-looking-up composition made for some impressive captures, but there was a backlighting problem, of course.
So it became fodder for this tutorial … Processing and blending two exposures.
(This tutorial was recorded in Photoshop CS5, but works in all versions of Photoshop and Elements.)
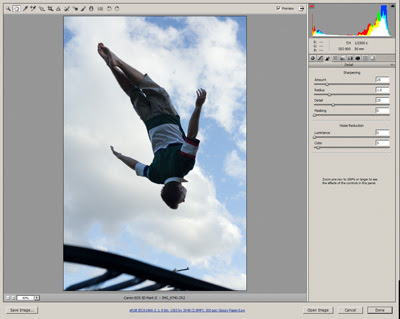
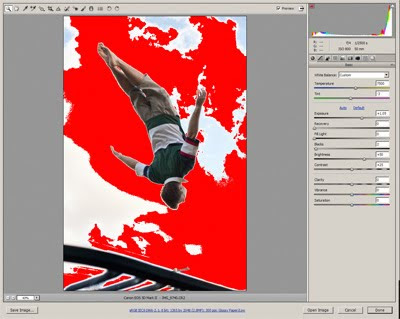
I began by processing the raw file twice – once where the sky was perfect, but I was too dark; and once where the sky was blown out, but I was just fine:
Elements users: After you process the file the first time, and open it into PSE, you must use File>Duplicate to make a copy. Then close the original and keep the copy open, while you re-process the raw file for the second version.
Photoshop users: The duplication isn’t necessary. Just process and open the file, and leave it open while you go back and process the raw a second time.
Then I placed them on top of each other in Photoshop …
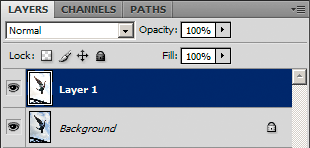
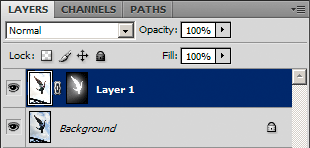
… and added a Hide All layer mask to the top one.

Now I was ready to begin.
First, I used the Lasso Tool to do a very rough preliminary cutout in the mask:
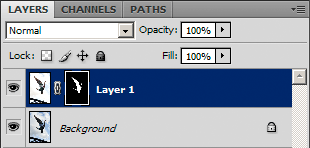
Then I zoomed in and got busy, gently painting the mask with white until all of me was revealed:

Getting there …
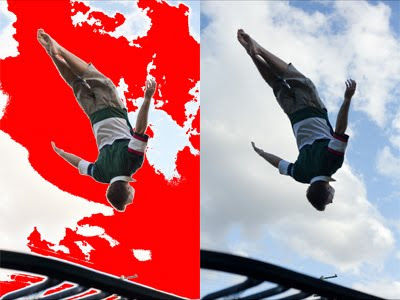
Occasionally I wanted to check my mask, so I’d hit the key to show the mask in red. This allowed me to tidy up any little areas I’d missed:
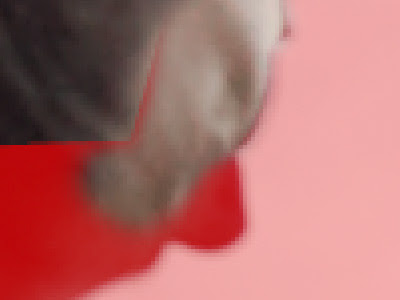
Once I’d gone all the way around, you’d think I might be finished, but in fact there’s more to do. The fact is, it’s easy to make edges look weird doing this method. Check out the odd "glow" around my fingers here:

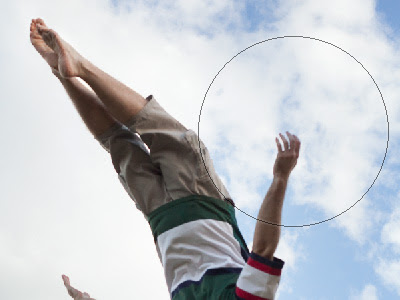
So, then I had to get a bit more subtle. I reduced my brush to a low opacity …

… and gently started "massaging" the edges here and there. Sometimes with a small brush, sometimes with a really big one:
I ended up with a mask that looked like this:
In effect, I’d added a sort of vignette around the image, by bringing through a bit more of the lighter image in the central area.
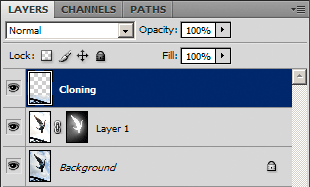
So now all the edges were blended and looking good, it was time to add the finishing touches. First a cloning/healing layer to get rid of that pesky power pole …
… then a couple of overall adjustment layers for final tweaks:

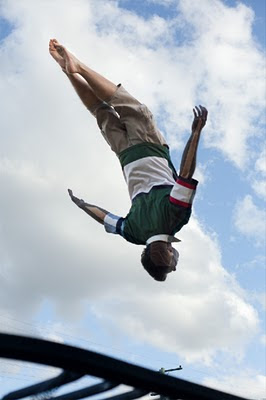
And that’s it! Here’s the two original exposures, and the final result:
White balance too!
This method can also be used to blend two versions of a photo with different white balances. This can be helpful in scenes with severe mixed lighting.