
Exploring Layer Blend Modes
I’m going to confess something … I don’t really know what all of Photoshop’s layer blend modes do. I mean, I have a vague idea about some of them, but I’ve never made any attempt to really learn them.
But that doesn’t stop me from using them! Not in the least. More often than I care to admit, I find myself saying: "I bet there’s a blend mode for this", and flicking through them optimistically, hoping to find one that does what I want.
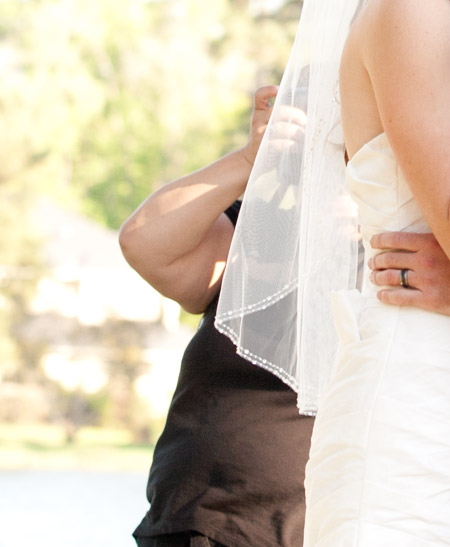
This photo is a perfect case in point. I haven’t shown it all here, but it was a gorgeous shot of The Kiss … marred by the second shooter standing behind them. D’oh! My client sent me this photo to ask me to “please clone out the second shooter”.
Let me start by clarifying something – this is not a job for the Clone Tool. I would have cloned if I had absolutely no other choice, but if you’ve read this tutorial, you’ll know that I avoid cloning wherever I can.
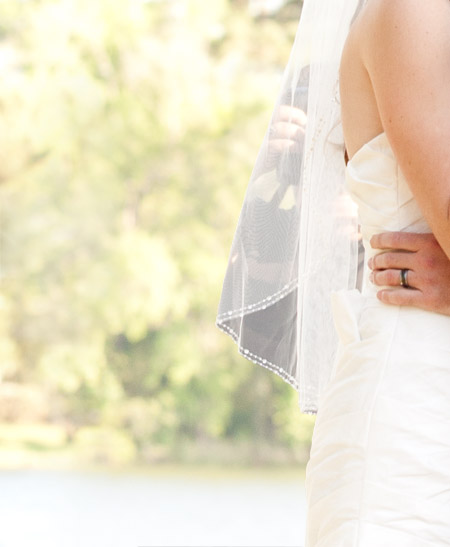
This one was easy, because there was a nice patch of equivalent greenery on the other side of the photo, which I was able to copy and paste loosely over the problem area:

Then it was a very simple matter of masking around the bride to hide the photographer. Well, not quite, as you can see. The photographer was still visible through the veil. How was I going to fix that??
At this point, I had no plan. So, my brain switched to its default backup plan: "try the blend modes!"
First, I copied the background greenery again (and realised I didn’t have quite enough, so copied and mirrored it again to fill the area properly). Then I lightened it some more. I still didn’t have a plan, but I figured that if I was going to make the greenery visible through the veil, it would be lighter, so that’s what I did.

Then – yes, you guessed it – I just started trying blend modes. (In case you’re not aware, the keyboard shortcut to cycle through the layer blend modes is Shift + and Shift -. You need to have the Move Tool selected for this to work.)
I was hoping that Screen might work, but it was tripe. My heart sank, but I kept going. My heart lifted a bit when I tried Overlay. Then I saw Hard Light and I said "Hooray!!!!"
Check it out – how good is that??? All the greenery is visible through the veil, but it maintains the important detail of the beading and creases. A miracle!
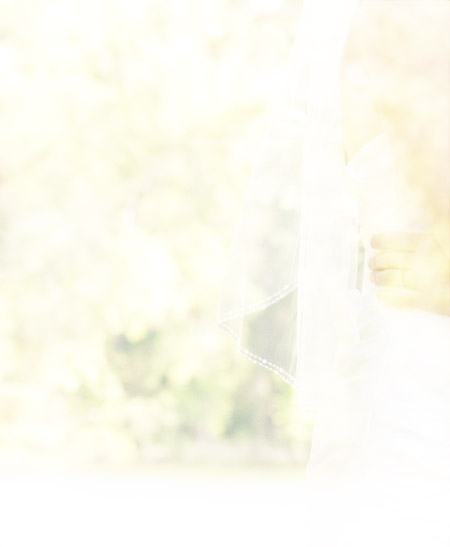
Don’t ask me why Hard Light worked so well here, because I have no idea! I’m just happy that it did!
Then I just masked it in:

And here’s the final comparison:
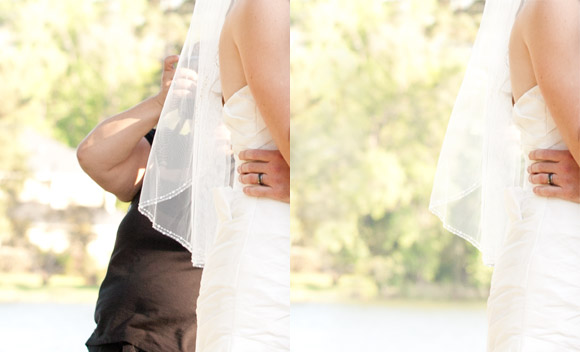
Of course it’s not perfectly realistic, but who is going to notice? Nobody, I bet.