
Using a gradient layer to fix a sky
The lovely Becky posted this gorgeous photo in the forum, because she was having trouble with the power lines in the background.

Needless to say, Becky’s first thought was to clone them out. But if you’ve ever tried to clone something like this, you’ll know that it’s impossible, because there’s nowhere to sample appropriate colour from. The sky above the lines is different (in both colour and tone) from the sky below, so there’s no easy way to merge them.
And healing isn’t an option either, because the lines go all the way across the photo, and the healing tools don’t work at the edges of photos, nor where detail intersects with other detail (the tree, in this case).
There's a good chance that Content Aware Fill could work, so it would be best to try it first. If it makes the tree turn weird, proceed with the following simple gradient method.
This tutorial was recorded in Photoshop CS2, but works exactly the same in all versions of Photoshop and Elements.
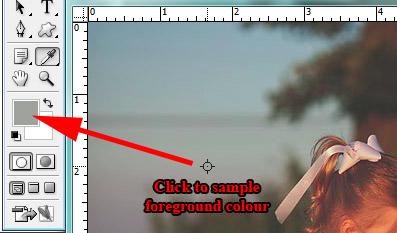
First, choose your eyedropper tool. Taking samples with that tool is the key to this method. At this stage, the colour swatches in your toolbar might be black on white, as mine are here, or they might be something else. We need to use our eyedropper to choose a foreground and background colour that we can use.
Click on the sky below the power lines to sample that colour as your foreground swatch.
Next, hold down Alt or Option, then click on the sky above the power lines to set that colour as your background swatch. (Notice that I didn’t sample right above the lines, but closer to the top of the image. The greater the distance between the two sample points, the better this method works, as a rule.)
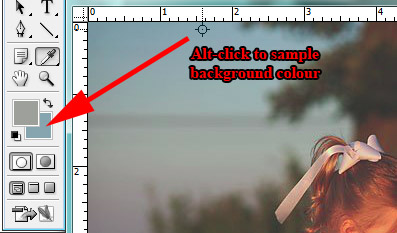
Now you have your colour swatches populated with the two tones of the sky.
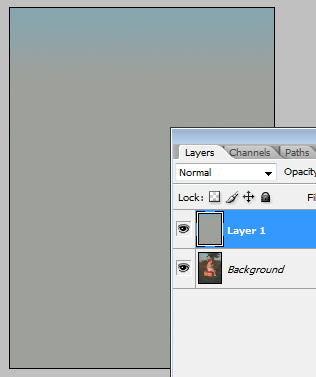
Make a new blank layer:

Choose your Gradient Tool (if it’s not immediately visible, it might be sharing a spot with the Paint Bucket tool):

In the Options Bar, make sure your gradient is the two sky tones that you’ve selected. There are all sorts of gradient options for you to play with another time, but for now you need the first one:
NOTE: If you can't find the rainbow options in your version of Photoshop, follow these instructions.
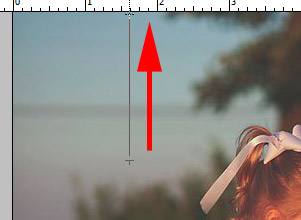
Click on approximately the point at which you took your first sample, then drag the gradient upwards and release the mouse at approximately the point at which you took your second sample. Make sure you hold down the Shift key as you drag, to keep the gradient nice and vertical:
Now your image will look like this. (If your gradient doesn’t go perfectly horizontally, it means you forgot to hold down the Shift key in the previous step, or you released it too soon. In that case, draw it again.)
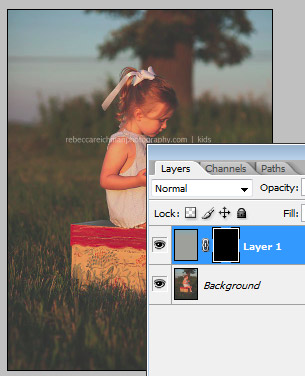
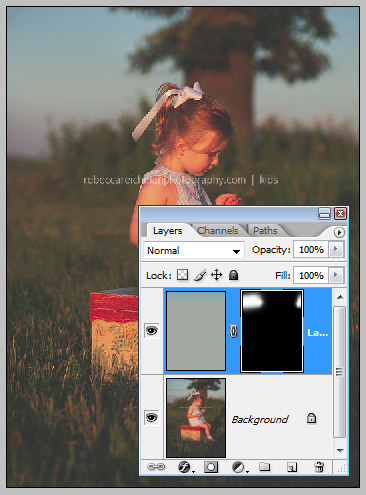
Add a black layer mask to hide the gradient layer:
Then choose your brush tool (a nice big size, with 0% hardness), and paint with white on the mask to reveal your gradient, and thereby hide the powerlines.
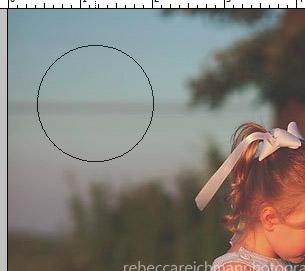
If you use a brush that’s too small, this won’t work so well. I think some people are a bit timid about big brushes, for some reason. Big and soft is the key.
Here’s my result. I’ve painted with white on the mask to create a new sky, and nobody can tell the difference.
One more thing to mention. To avoid banding in your new section of sky, select the gradient layer (not its mask), then zoom in and add a little bit of noise using the Filter menu.