Distortion or perspective correction tutorial [Photoshop]
If you have Elements, please go to this page instead.
This tutorial is for those times when you need the lines in your photo to be straight and square. It’ll be most useful to real estate photographers, but everyone has a problem with lines from time to time.
Step 1: Open
Open your image in Photoshop.
(Distortion is like Liquify – it must be done as the very first step in your Photoshop editing workflow, immediately after your raw editing, before any layer work.)
Step 2: Convert
Immediately go to Layer>Smart Objects>Convert to Smart Object:
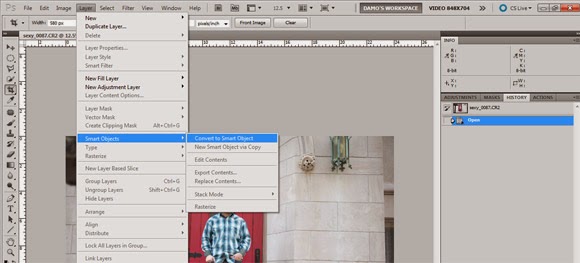
It’s critical for your image to be a smart object when transforming or distorting. Smart objects can be manipulated as many times as needed, and never lose their original quality.
Step 3: Set Grid
Go to Edit>Preferences>Guides & Grids. In the Grid section, set up your gridlines every 5 percent, with 1 subdivision, then press OK:
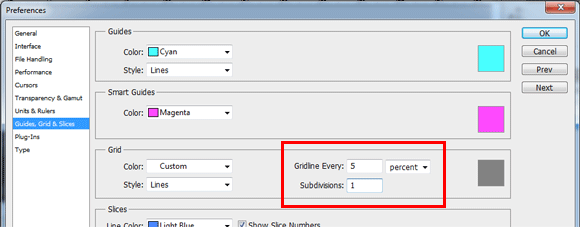
(The above is a suggestion only. I’ve found 5/1 works well in most cases. But of course you can vary it to suit your needs. There’s more info about grids here.)
Step 4: Show Grid
Press Ctrl/Cmd ' (apostrophe) or go to View>Show>Grid, to turn on the gridlines.
Step 5: Canvas Size
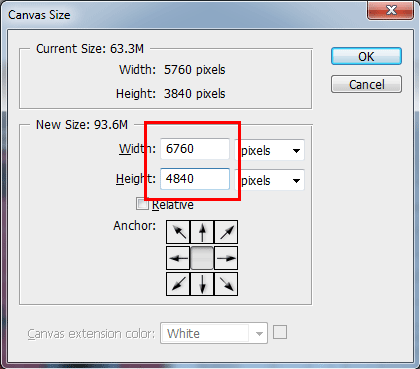
Go to Image>Canvas Size. Add some extra size to the file. I usually add a thousand pixels to each dimension, as shown here:
Step 6: Go!
You’re ready to begin. Press Ctrl/Cmd T to activate the transform handles on the image. By now, everything will look something like this:
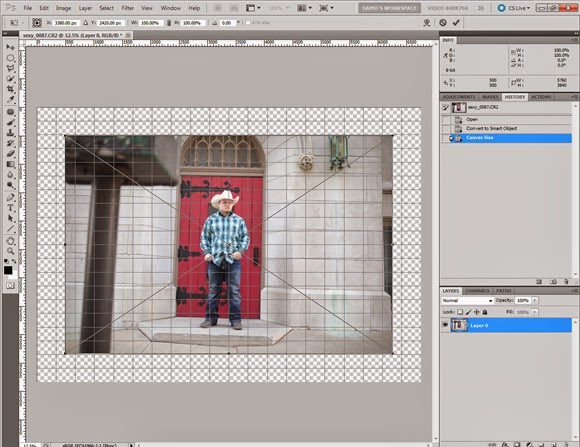
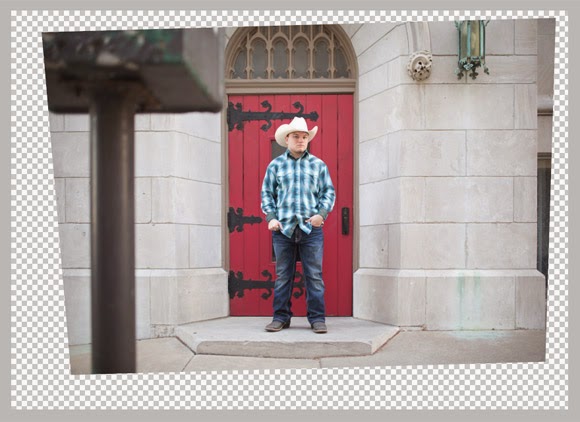
(By the way, many thanks to Vannessa Edwards for allowing me to use this photo.)
From here on, what you do is up to you. Every photo needs different distortion to get the lines right. The more you practice with the various Transform functions, the more skilled you’ll become.
Let’s take a look at what I did with this one. First, I rotated it slightly so that the horizontal brickwork was, in fact, horizontal:
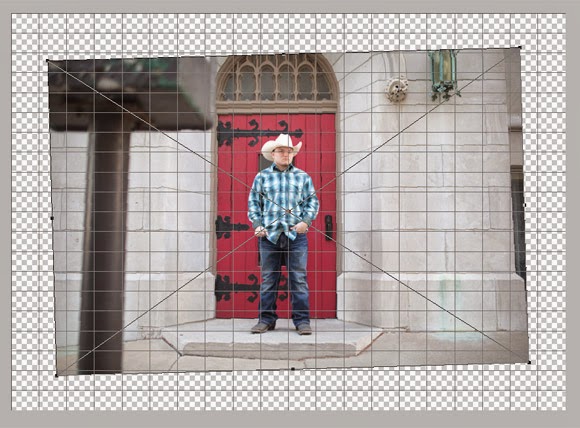
Now I was happy with the horizontals, but not the verticals. See how the vertical lines are slanting inwards on each side?
So, without pressing Enter or Return or anything like that, I went up to Edit>Transform> and chose Perspective:
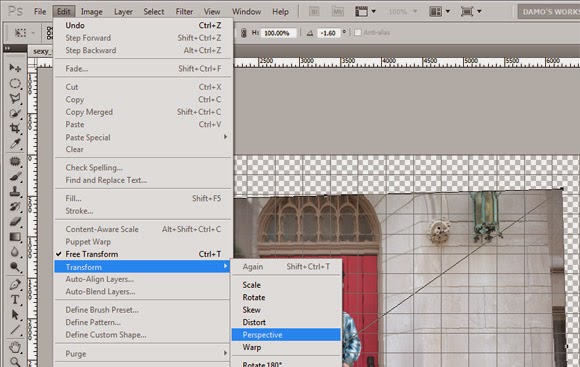
That allowed me to pull the top edge wider, until I was happy that the vertical lines in the photo lined up with the vertical lines of the grid (see why the grid is important?):
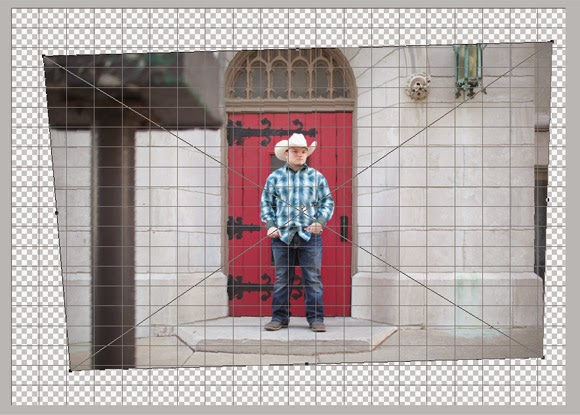
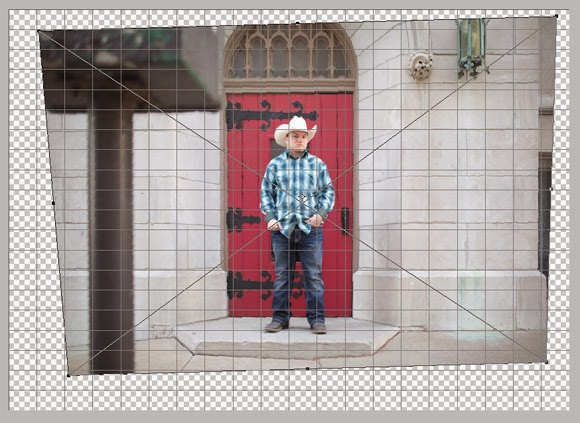
That was ok, but I was concerned that the poor guy looked a bit … well, stumpy. So I went to Edit>Transform>Scale, so that I could pull the whole photo up a bit to make him taller:
Step 7: Finish and assess
Happy with that, I finally pressed Enter to commit the transformation, then Ctrl ' to hide the grids again, so I could get a clear view of my result:
Step 8: Transform some more (if needed)
If you’re happy, that’s great. But if you’re not happy, no problem – just press Ctrl T again, and then keep on tweaking. As I said earlier, because the image is a Smart Object, we can tweak the distortion as much as we like, and never lose any of the original file quality.
Step 9: Normal editing
Now you can save the PSD file, then proceed with your normal editing. Remember, DO NOT CROP the image. Normal cropping rules apply – never crop during editing. Only crop when it’s time for output.
Another example:
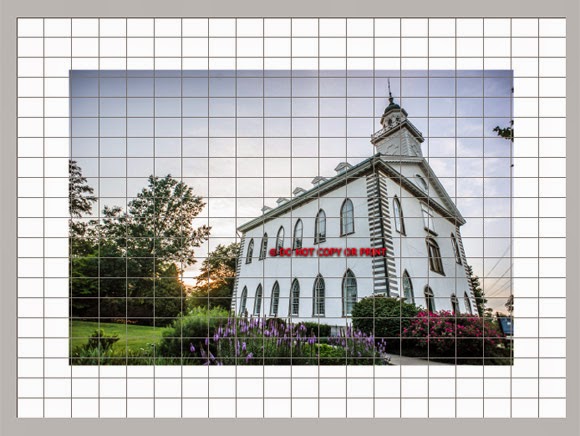
Thanks to Jacki Archibald for the use of this lovely photo. Here’s the original, and it was the subject of some debate on Facebook today as to whether it should be adjusted at all:
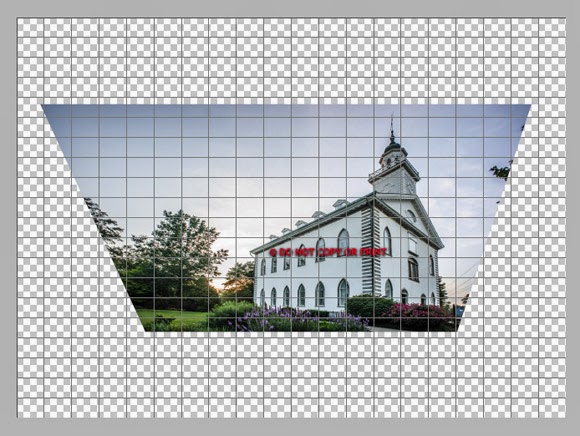
For the sake of the exercise, I used the Perspective and Skew functions to do this:
I hope you’ve found this useful. Please don’t despair if you don’t master it right away. It takes a little while to figure out what all the Transform options do. And of course, the best way to learn is to play play play. Have fun!
