
Correcting eyes distorted by glasses
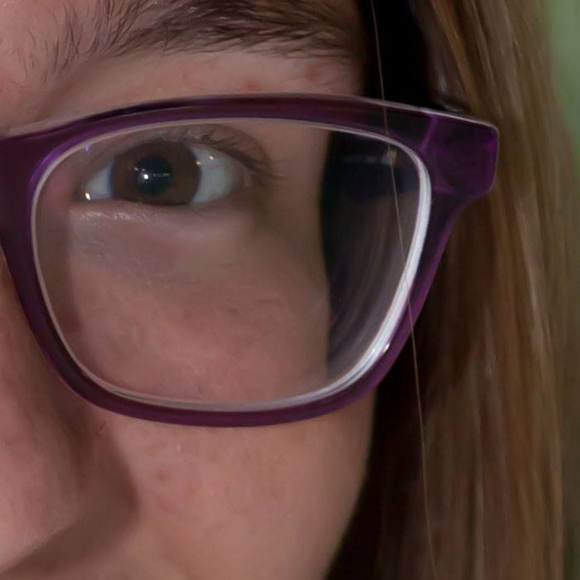
Thick glasses can make people’s eyes look small, and sometimes it’s nice and flattering to be able to correct this. Usually, it’s quite simple.
Note: This method is demonstrated in Photoshop. It’s almost the same in Elements, but is one little step that can’t be performed. I’ll mention it along the way. By the way, many thanks to Pam Frechette for her permission to use the image segment in this demonstration.
Here’s the photo. See how the glasses have shrunk the face inwards?
Step 1:
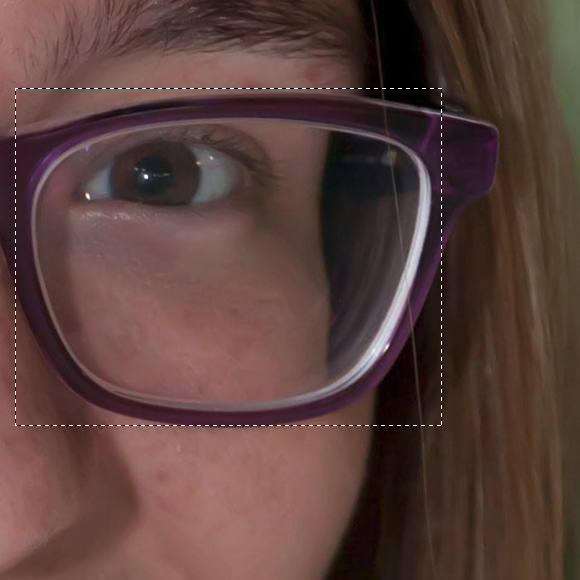
Use the Marquee Tool to select an area around the frame. No particular precision necessary, just make sure you get it all:
Steps 2, 3 and 4:
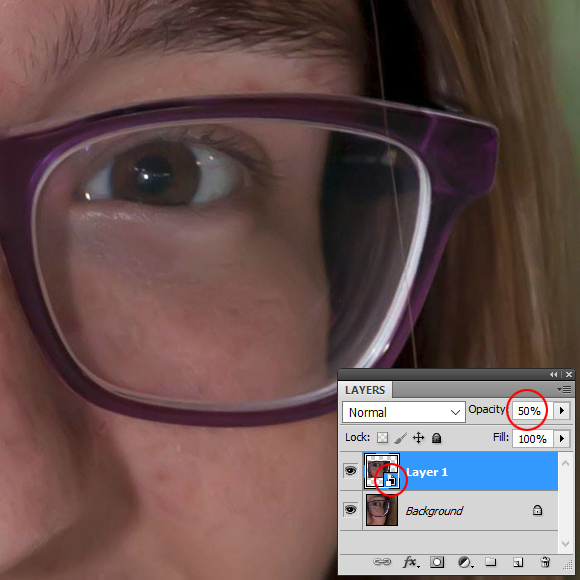
Duplicate the selected area onto its own layer, then immediately go to the Layer menu and convert the new layer to a Smart Object. (Elements users, you can’t do this step. It’s ok, it’s not the end of the world). Then lower the layer opacity by half, ready to enlarge:
Steps 5 and 6:
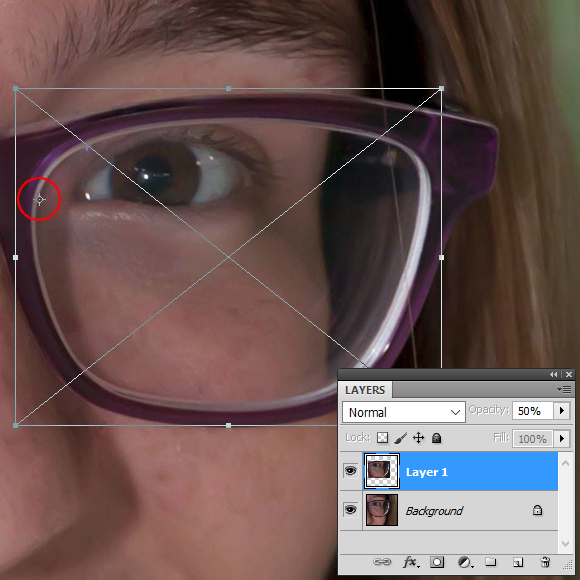
Press Ctrl T (Cmd T if you’re on a Mac, of course) to get the transform handles. Then Alt-click just inside the frame on the nose side, to put the centre point there. This means that when you enlarge, that point will stay exactly where it is, and everything else will enlarge around it:
Step 7:
Hold down your Alt and Shift keys and grab one of the corner handles, and drag carefully outwards until the edge of the face inside the frame lines up plausibly with the edge of the face outside the frame:

IMPORTANT: When you’ve got the size exactly where you want it, make sure you let go out the mouse button before you let go of the Alt and Shift keys. Otherwise the layer will get distorted out of shape.
Tip:
Some of you might find that your transformation distorts out of shape even though you've got the Alt and Shift keys held down. If this happens, it's because your version of Photoshop has this little link icon pressed by default in the Options Bar:
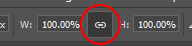
If this happens to you, you can either click that link to deactivate it, or leave it activated and only hold down the Alt key, not Shift, while transforming.
Step 8 and 9:
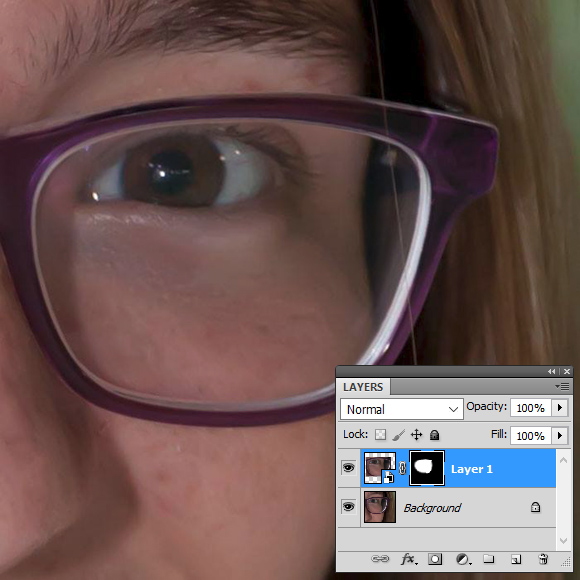
Press Enter/Return to commit the transformation and get rid of the handles. Then increase the layer opacity to 100% again.
Final steps:
That’s pretty much it! Now just add a mask to the layer and mask it in very carefully. Don’t forget to turn the layer on and off a few times to check that your transformation is plausible, and your masking is perfect.
Additional notes:
- Another example of the Alt-click thing here.
- If the basics of layers and masking in this article are confusing to you, this class will change your life, I promise.