Batch adjust timestamps in Lightroom to easily sync files
Thank you to my dear friend Christina for providing this article.
One awesome feature built right into Lightroom is the ability to batch adjust timestamps for all files from a single camera. This feature is a huge timesaver for any weddings or sessions when you’re handling files from multiple cameras — if you’ve got a second photographer, or if you’re shooting with two bodies, for instance. I’m not always able to manually sync all the cameras before an event starts (often, I have my seconds start with the groom while I start with the bride), so knowing that I can very easily batch adjust the timestamps after the fact is a huge plus!
One tip for shooting with this trick in mind:
At some point during the event or session, try to take a simultaneous photo with the two cameras. I usually pull my second aside during a quiet moment and have us take a purposely out-of-focus shot of the grass (or an in-focus shot of a clock with a second hand) at the same moment. (Or if I’m shooting a session with two bodies, and realize I’ve forgotten to check to make sure the timestamps are synced, I’ll point both cameras down and press the shutter buttons simultaneously to get my OOF reference shots.) This will make it easier to find the images that you’ll use to sync the timestamps. If you forget to do this, though, you can approximate based on photos taken nearly simultaneously.
So: you’ve shot your event or session, uploaded all your files, and realize that the files from one camera are a few minutes off from the files from another. Never fear — Lightroom to the rescue!
Step 1: Import and prep
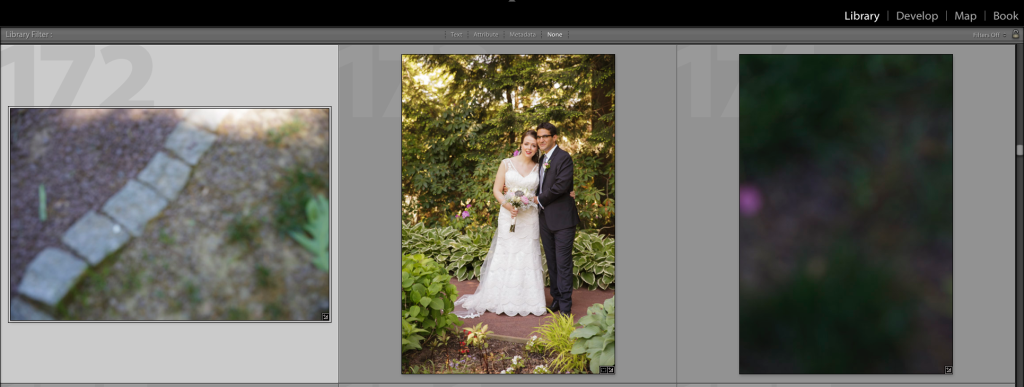
Import all your files into Lightroom. Scroll through them in the Library module until you can identify files taken from each camera at a simultaneous (or near-simultaneous) moment. If you took simultaneous reference photos while shooting, this step will be easy. If not, look for a key moment where you and your second likely took simultaneous shots — the first kiss, the cutting of the cake, etc.
Below is a screenshot of my LR Library window, showing the two blurry reference photos my second and I took.

Step 2: Filter for first camera
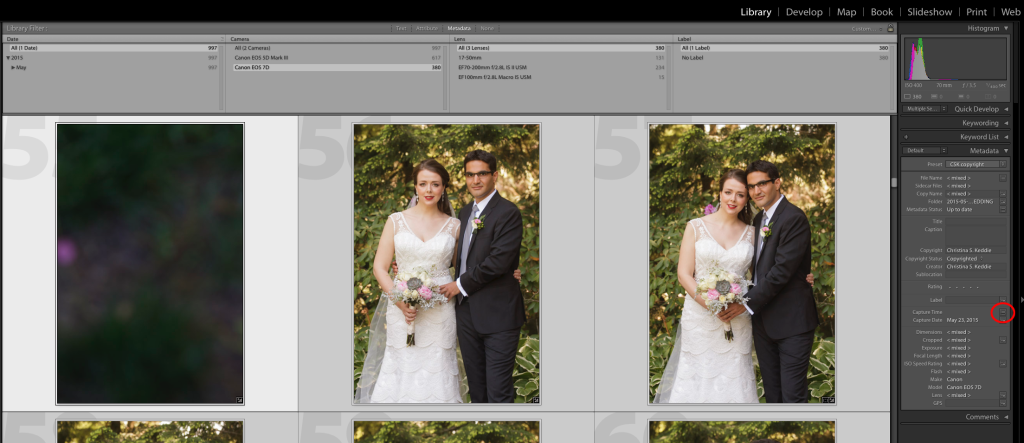
Make sure the filter bar across the top is showing (shortcut key if it’s not showing). From the filter bar, choose Metadata, and then look for the separate cameras in the Camera column. If the cameras in question were the same model, then you’ll need to filter by camera serial number — simply click the word "Camera" in the filter column and choose "Camera Serial Number" instead. Click on one of the cameras to activate the filter and show only files taken by that camera.

Step 3: Get reference photo timestamp
Find and select your reference photo from this camera. Look over at the metadata panel on the right, and take note of the capture time. Write this number down, including seconds and everything.

Step 4: Filter for second camera and select all
Go back to the filter bar, and this time click on the other camera to show only files taken by that camera. Find and select the reference photo taken by this camera. Then hit ctrl+A (or cmd+A on a Mac) to select all the files taken by this camera. You’ll note that while all the files in your Library are highlighted, the reference photo is highlighted with a stronger white.

Step 5: Access "Edit Capture Time" window
Look at the metadata panel over on the right again, and now click on the box to the right of the Capture Time field (circled in red in the screenshot above). This box will bring up the Edit Capture Time window. Note that your reference photo will be in the preview on the left in this window.

Step 6: Batch adjust the timestamps
Make sure that "Adjust to a specified date and time" is selected in the Type of Adjustment section. In the New Time section below, the Original Time is the original timestamp of your reference file. You’ll want to enter in the timestamp you wrote down into the Corrected Time box. Then click "Change All."
Immediately, all of the files you’ve selected from the second camera will be adjusted by the exact same amount of time.
Step 7: Confirm the batch adjustment
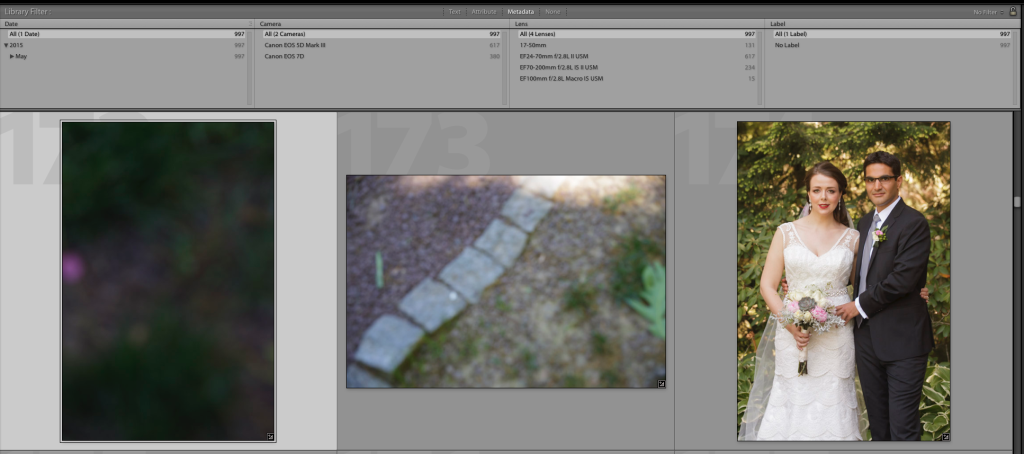
Back in the Library module, go back up to the filter bar and choose "All (2 Cameras)" to show you all your files. Your two reference files will now be side by side, and all your other files will now be synced to the correct chronological order.

And that’s it! It takes significantly longer to read through this tutorial than to actually perform this function — it’s the work of about 20 seconds for me now at the beginning of my wedding editing workflow. So much easier than renaming files individually or manually sorting all of your files in an attempt to sync multiple cameras!
