Color space settings for the Lightroom user
Thank you to my dear friend Christina for providing this article.
How to ensure your files are safely in sRGB in Lightroom
Its very important that you maintain an all-sRGB workflow in processing your raw files. (See here for more information on why this is so).
If youre using Lightroom as your workflow management and raw processing software, there are three important steps to take to make sure that your entire workflow is safely in the sRGB color space. NOTE: All three steps are vital, so make sure to check your settings in all three sections! These three steps should cover you in all cases, but there is sometimes a glitch in how LR and PS(E) communicate with each other, so if you find that a file you’ve sent from LR isn’t in sRGB, go to Step 4 for an important troubleshooting step.
STEP 1: Soft Proofing mode for an accurate histogram (in LR4 and higher).
Lightrooms default color space is ProPhotoRGB, and the Develop module histogram displays information in that space. In order to have an accurate histogram while editing your raw files, you must turn on Soft Proofing mode.
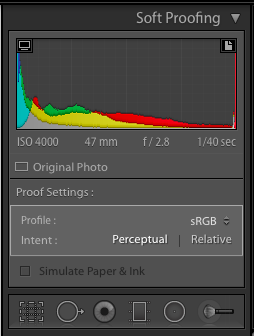
Once in the Develop module, hit S to activate Soft Proofing mode. (The first time you do this, you may get a popup box asking if you want to create a virtual copy for soft proofing. Choose "Make this a proof", and check the "Don’t show this again" box). Now you’re in Soft Proofing mode, and a new set of options will show up under your histogram. From the Profile dropdown menu, choose sRGB, and keep the Intent option set on Perceptual:
There are a few other indicators to show that you’re in Soft Proofing mode, all circled in the screenshot below:
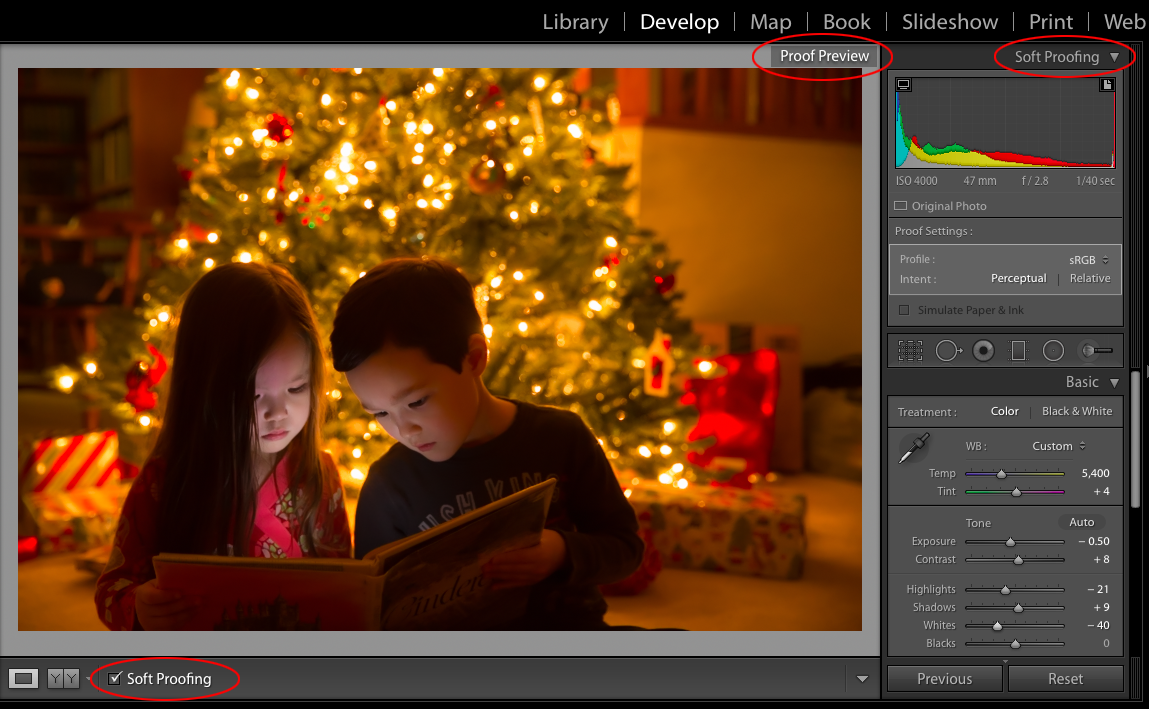
You’ll have to activate Soft Proofing mode every time you start working in LR. So just make a habit of hitting S once you’re in the Develop module. Now you can edit with a reliable sRGB-based histogram.
STEP 2: External Editing preferences so all files are sent from LR to PS(E) in sRGB.
Remember that raw files have no color profile assigned to them they’re just data, not image files. Its your raw processor that assigns the color profile. So once you send a file from LR into PS or PSE for editing beyond your basic raw processing, you need to make sure that LR sends that file in the correct color space.
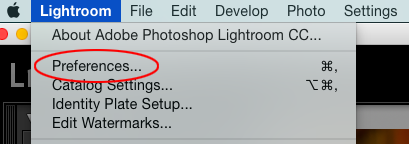
Go to Lightroom > Preferences (or on a PC: Edit > Preferences):
Once in the Preferences menu, choose the External Editing tab:
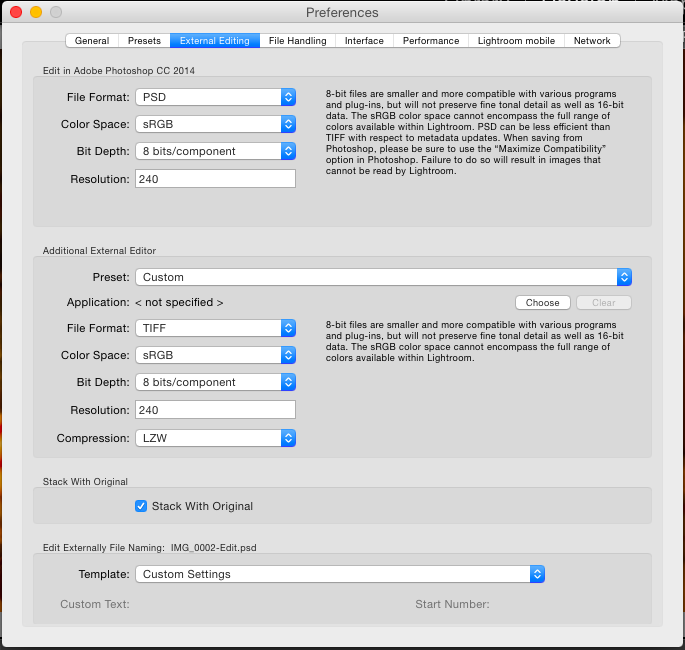
There are two main sections in this window, one for each of two possible external editing programs. Most of us have only one external editing program a version of Photoshop or Photoshop Elements. So the top section will be populated with that version of software (in my screenshot here, its labeled Edit in Adobe Photoshop CC 2014; yours will have your version listed). The second section may have another program listed, if you’ve got a second one associated with your LR. If you have two programs, make sure to follow these steps for both of those sections.
Make sure your settings are set as follows:
- File Format – can be either PSD or TIFF, depending on which you happen to prefer
- Color Space – sRGB
- Bit Depth – 8 bits/component
- Resolution – does not matter in even the slightest little bit what you have in this box
Some versions of LR will have a Restart Lightroom button at the bottom of this box; click on this button to ensure that these setting changes are remembered as your new defaults. (If your version of LR doesn’t have that Restart Lightroom button, then you don’t have to worry about restarting to effect this default settings change. But of course, do restart your computer on a very regular basis for good computer health!)
Check in PS(E) to make sure that your files are indeed being sent in sRGB. Once your file is in PS(E), look at the document profile indicator at the bottom left of your image window:
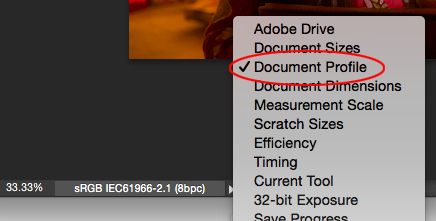
That box should always say sRGB, followed by a string of letters and numbers. If this box says anything other than sRGB, and you’re confident that you’ve got all three of these vital steps set up correctly, go to Step 4 in this article to fix this glitch.
STEP 3: Export settings for all final JPGs exported out of LR
Step 2 above ensures that any files you send to PS via the edit in function will have the sRGB profile assigned to them. And you should use the edit in function to send files directly from LR to PS any time you want to do any PS editing to your files. In almost all cases, it's the best and most efficient way to handle that transfer. No need to export JPGs and then edit them to create master PSDs and then create more final output JPGs after all that!
But there is definitely a time and place for using LRs export function. (Personally, I use LR to manage my entire workflow so after I've finished creating all my master PSDs using the edit in function, I'll select them all in my LR library and export the whole set in order to batch rename and save a set of output JPGs.)
If and when you do export any files out of LR, make sure that you’re exporting them in sRGB!
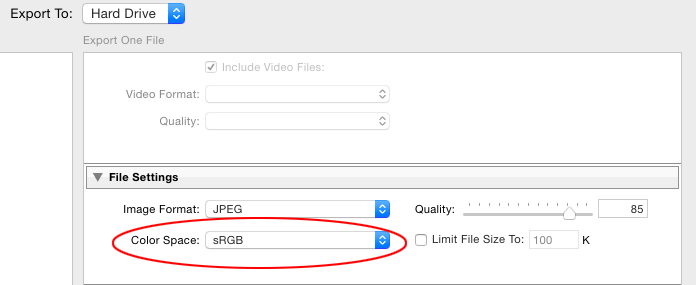
In the export dialog box, scroll down to the File Settings section. Make sure that the Color Space box is set to sRGB.
STEP 4: Troubleshooting in PS(E) if your files aren’t in sRGB
Sometimes, there’s a glitch in how LR and PS(E) communicate with each other, and even if your LR settings are all correct your files show up in PS(E) in the wrong color space. (This, incidentally, is one reason why its vital to have your document profile indicator turned on in PS(E), and why you should make a habit of taking the half second to glance down at it every time you start working on a file in PS(E) to make sure you’re in the right color space!)
If this glitch is happening to you, there’s a very simple fix. Open a single raw file in PS(E), which will make the Adobe Camera Raw window open:
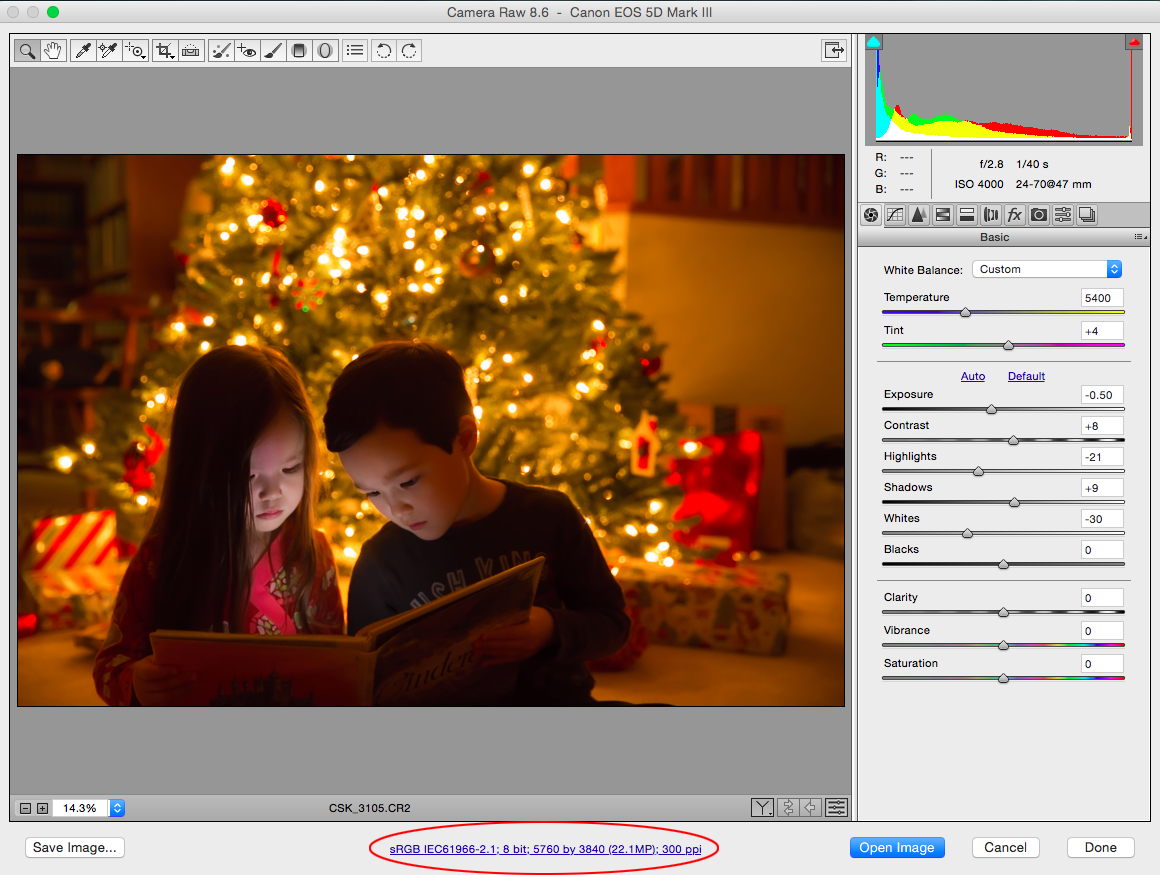
Click on the blue link at the bottom of the window. In my screenshot above, it says sRGB, but if yours is glitching, it will say AdobeRGB. Clicking on the blue link will open the Workflow Options dialog box:
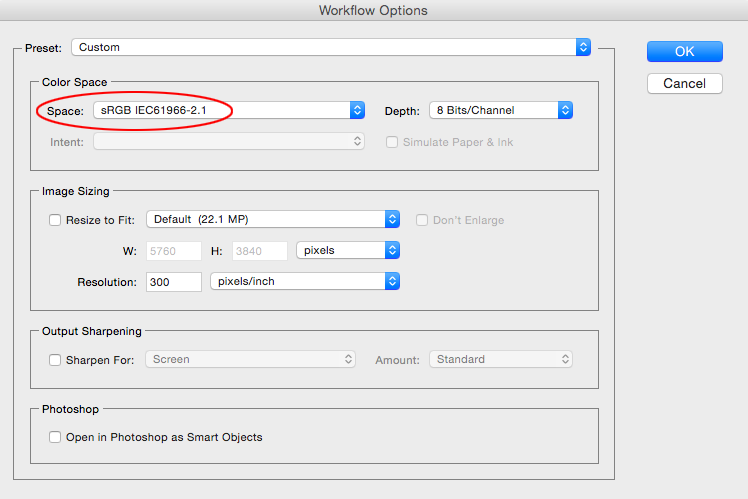
Change the Space setting to sRGB, then press OK. Then press Done in your ACR window to close ACR. Then restart your computer.
