Fixing chromatic aberration
Chromatic Aberration ("CA") is that annoying purple or green (or other colours) fringing you get around bright white areas of your photos sometimes.
See it around the hat in this photo?

Some lenses are more prone to it than others, from what I understand, in photos of high contrast. I’m not a photographer, so I don’t know anything about that. You’ll find more info on Wikipedia and elsewhere. What I do know about is fixing it.
First: Try fixing it in raw
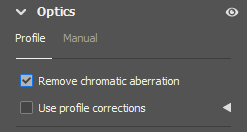
Lightroom and Adobe Camera Raw (with Photoshop, but not Elements) have functions for fixing CA, in their "Optics" section (in older versions it’s the "Lens Corrections" section). First, there's the "Remove chromatic aberration" checkbox ...

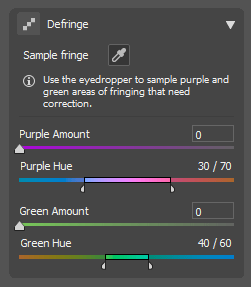
... and after that there's the "Defringe" function:

These features get better with every version, so I hope they'll work for you. Remember to be zoomed in to 100% while fixing CA!
If the raw fix doesn't work, no biggie. Time for …
The Photoshop solution
I would generally recommend fixing CA fairly early in your workflow, but if you don’t remember it until later, it’s not a problem. Just remember that it’s a pixel layer fix, so like all pixel layers, it must go underneath all of your adjustment layers, the same as for cloning.
Step 1
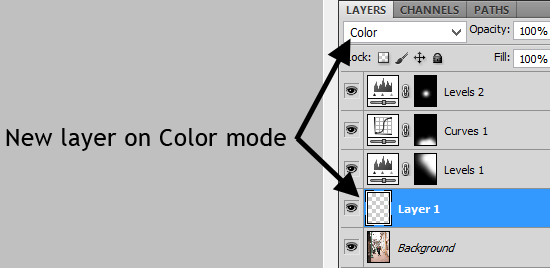
Add a new blank layer immediately above your Background layer, or immediately above any other pixel layers you might have already created (but below any adjustment layers). Set the new layer to "Color" blend mode:

Step 2
2a. If you’re using Photoshop Elements, temporarily turn off all the adjustment layers above the new layer. Then choose your Clone Tool and make sure "Sample All Layers" is checked in the Options Bar:

2b. If you’re using Photoshop, you don’t need to turn off any layers. Just choose your Clone Tool, and make sure "Sample: Current and below" is selected in the Options Bar:

Step 3
It’s easy. Just clone nearby good colour over the problem area. Like magic, the problem will disappear as you clone:

Note: You don’t have to clone. In cases where there is a long area of exactly the same colour required, it might be easier to sample that colour with the eyedropper tool, then paint with the brush tool. Whatever suits you.
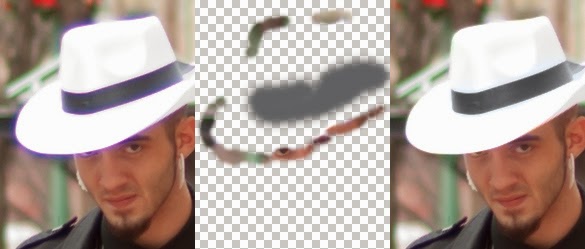
Here’s my result. On the left, a close-up of the original problem. In the middle, a look at what the clone/paint layer looked like by itself (you can see I cloned around the edges, but painted over the band of the hat in the middle). And on the right, the finished result:

It’s a quick method, which almost always works well. If it’s not working for you, visit me for more help.
My thanks to Jessica from JR Wellington Photography for her permission to use her photo in this article.
