
High Pass Filter Sharpening
This quick tutorial explains the bare bones of sharpening using Photoshop’s High Pass filter.
About High Pass Sharpening
The High Pass filter in Photoshop’s Filter menu provides another method of sharpening our photos.
It takes a little longer to perform than Unsharp Mask, but some people feel it gives them more control.
Step 1:
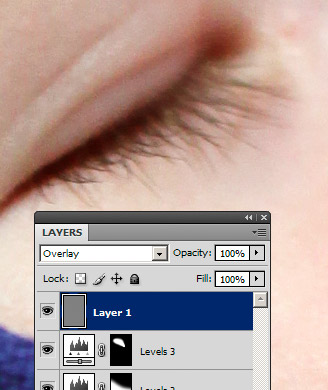
Perform all your usual edits on your image. Sharpening is usually the last step in a workflow.
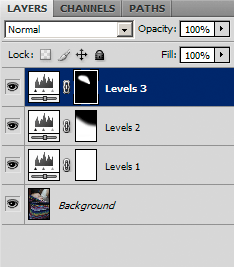
I’ve enhanced this photo using three Levels layers.
Step 2:
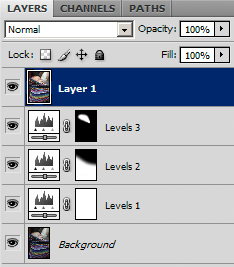
Make sure you have the topmost layer selected, then press Ctrl-Shift-Alt-E to make a new merged layer.
Step 3:
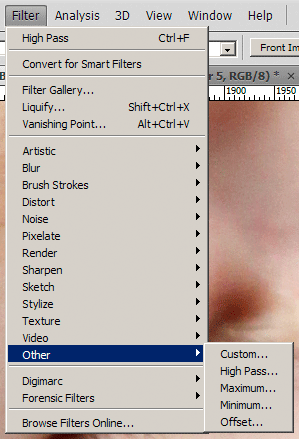
Choose Filter > Other > High Pass.
Step 4:
Navigate to an important focal point (eg eyelashes) and enter the desired sharpening radius.
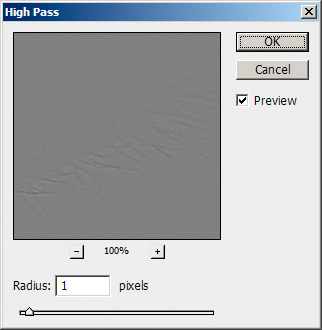
What radius to choose?
This is a tricky question to answer broadly. Just like when using Unsharp Mask, the choice of sharpening radius depends on the image quality, the subject matter, the output medium, and ultimately, the personal preference of the user.
You’ll need to do some experimentation to find the radius that works best for you and your images.
Broadly speaking, here are some suggested Radius settings:
- For web: 0.2-0.5 pixels
- For print: 0.3-1.5 pixels
- Rescuing out-of-focus images: 2.0-6.0 pixels
Step 5:
Change the layer blend mode to Overlay.
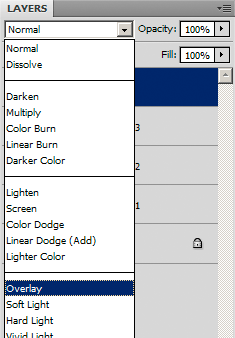
Step 6:
Analyse the result, and reduce the layer opacity if it’s too strong.
What’s the benefit of High Pass sharpening?
A lot of the time, nothing. For most images, Unsharp Mask does as good a job, and quicker.
The significant advantage to High Pass sharpening is that it is done non-destructively. That is, it is done on a separate layer, where the opacity can be adjusted to taste, a mask can be applied for selective sharpening, and the whole layer can be discarded if not wanted.
At this point you might be saying "So what? I can run Unsharp Mask on a duplicate layer too."
Yes, you can, BUT as soon as you do that you lose the ability to re-adjust the adjustment layers beneath.
Because High Pass sharpening uses the Overlay blend mode, you can continue to make colour adjustments to the image after you’ve applied the sharpening.
Whether this is advantageous to you depends on your workflow. If you only sharpen for output, and your workflow goes Flatten/Sharpen/Save, then you’ll often have no need for non-destructive sharpening.