
The right way to approach adjustment layer masks
This tutorial was written in Photoshop CS4, but applies to all versions of Photoshop and Photoshop Elements.
Introduction:
Selective editing is what makes Photoshop amazing. The ability to improve any area of a photo – big or small, or downright tiny – using layers and masks.
But everywhere I go, I see that Photoshop users are taking the indirect and counterintuitive route to their selective adjustments. In short, they’re doing it backwards.
Let me open your eyes to a much smarter approach to your editing.
The Common Approach:
Let’s use this paddock photo as an example. It’s lovely and serene, but the foreground lacks contrast.
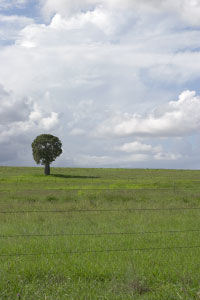
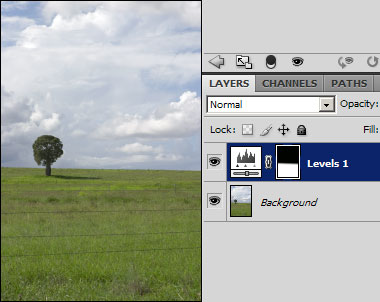
The conventional approach is to start by adjusting the contrast of the whole photo, but only paying attention to the grass:
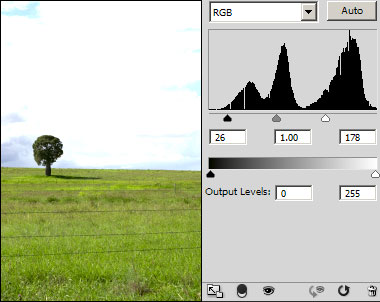
Needless to say, the sky gets blown out, so the next step is to paint black on the layer mask to recover the sky …
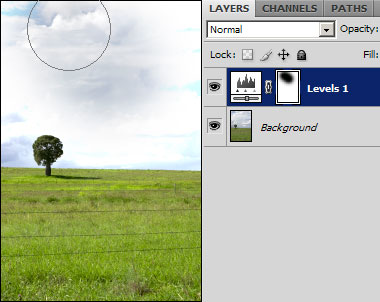
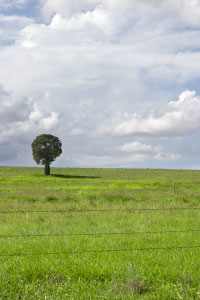
… giving a perfectly satisfactory result. Improved grass, and unchanged sky:
Shortcomings of the Common Approach:
Ok, so if the above technique gives good results, what’s the problem?
There are three important, but overlooked, failings with the common approach.
1. The histogram is irrelevant
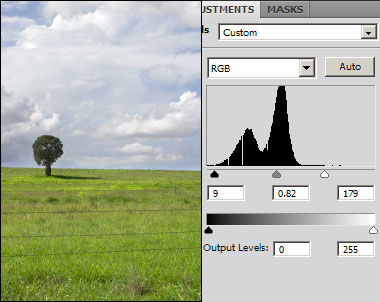
Take a look at the Levels histogram above. You can’t identify the relevant data (ie the grass), because the histogram is describing the entire image. So my adjustments were merely guesswork.
2. You can’t preview your adjustment accurately
In the above example, I couldn’t tell when my grass looked "right" compared to the sky. I was just guessing. Only after I’d painted my mask could I evaluate if my adjustment looked credible.
If I found that my adjustment was unsuitable, then I’d have to go back and adjust the Levels again.
3. It’s slooooooooww
Seriously, there are just too many steps. Adjust, guess, mask, check, re-adjust.
The Better Way:
It is much better to make your selection before you make the adjustment. This way, the histogram is accurate and the preview is reliable. And your editing is faster.
Direct from Selection to Mask:
Begin by selecting the area of intended adjustment. Photoshop and Elements offer more selection methods than you can poke a magic wand at!
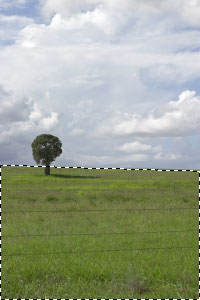
Choose your adjustment layer, and VOILA! Immediately, your selection becomes the mask on the adjustment layer.
Now, your histogram accurately represents the data within your selected area. This makes precise adjustments of Curves or Levels much easier.
Plus, you can watch your adjustment as you make it, and evaluate it in comparison with the rest of the image. This negates the need for repeated adjustments, and speeds up your workflow.
One more thing:
If you make your selections first, then you get to use the handy layer mask tricks.