
Working with dual screens (Windows 10)
If you’ve never worked with multiple monitors, it probably seems like a nerdy over-kill thing to do. But gosh, once you’re used to having the convenience of two screens, it’s very hard to go back to one!
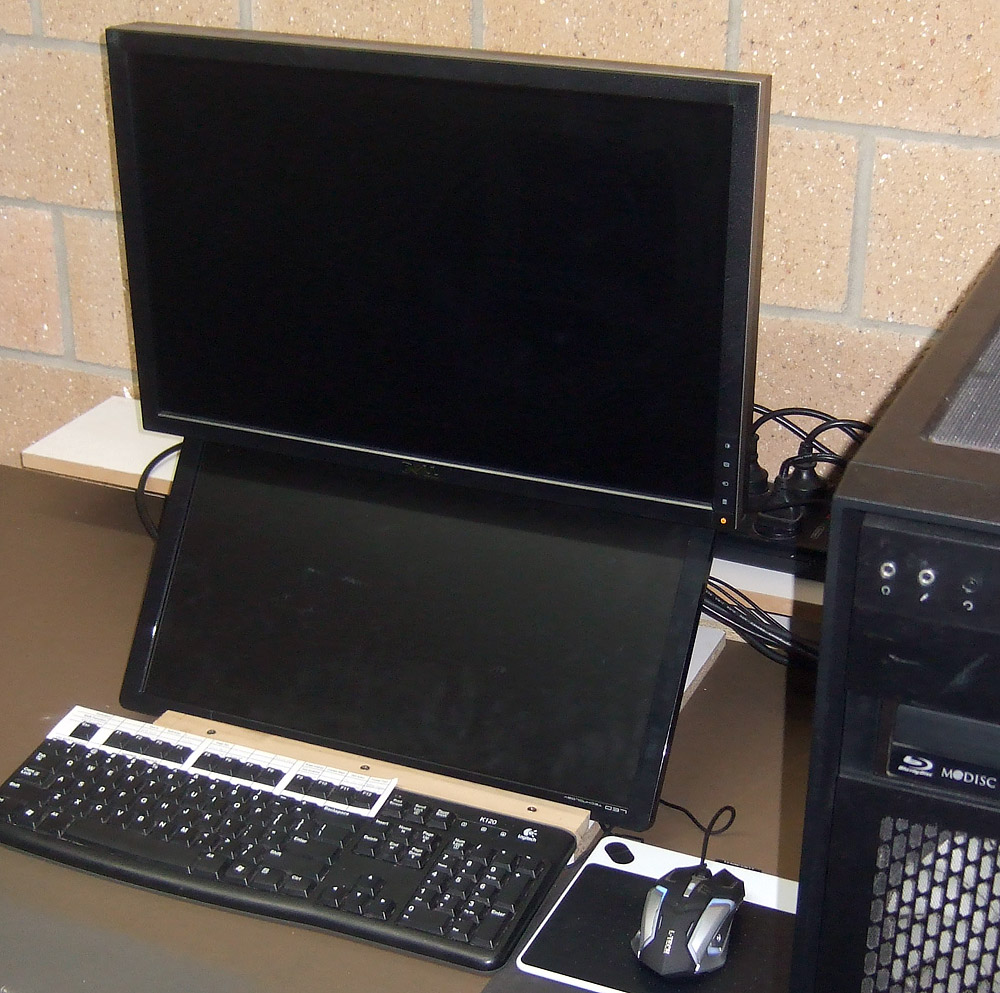
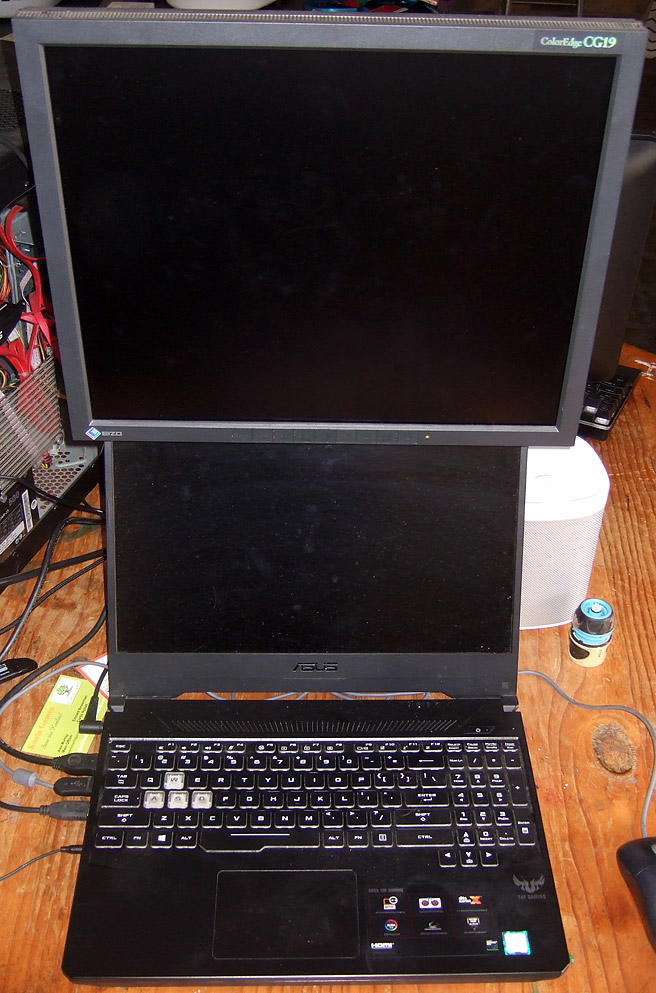
Personally, I even prefer having two smaller screens than one massive one. I’ve tried a one-big-screen setup a few times, but it just irritates me (and I ranted about it here). I used to be a side-by-side guy, but recently I’ve transitioned to one-above-the-other setups and I love it even more.
Anyway, there are a few things that photographers need to know about properly setting up dual screens on a Windows system, so I hope this article will help you out. Even if you calibrate your monitors each month, as you should, there are a couple of pitfalls which can ruin your colour-management.
How to use dual screens
There’s no strict rule about this, but I think it’s fair to say that every photographer chooses their best screen (ie the one that calibrates most accurately) as their editing screen. That’s the one they use for Photoshop, or Lightroom, or whatever editing software they use.
The second screen is the second-best one. If it’s almost as good as the main one, it might be used for Bridge, or a secondary Lightroom screen, or other tasks that require good colour rendition. Or if it’s a rubbish old screen, like one of mine is, it’s strictly used for emails and windows and YouTube and stuff.
You’ll find what works best for you. The most important thing is: make sure they perform different tasks! Don’t allow one screen to be a copy of the other. I’ll talk more about this later.
The connection
There are a number of different monitor ports, and your computer will have one or more of them.
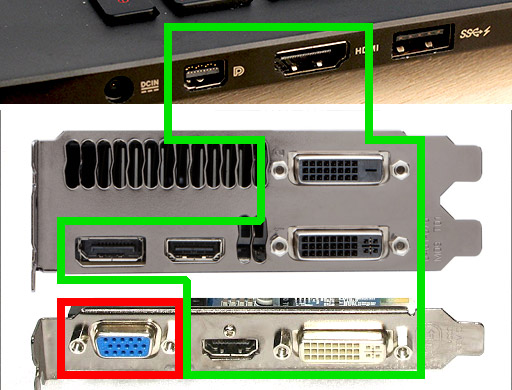
I won’t go into the different technologies in any detail here. Google if you’d like to learn more. For now, it’s sufficient to say that all the ones in green are good – they’re digital connections. But the one in red is not good – it’s called a "VGA" or "D-Sub" port, and it’s old-school. If your computer and screen have one of those, don’t use it if you can avoid it. If your computer or screen only have one of those, it’s time to upgrade. You need to be using one of the modern digital connections for best colour rendition.
Having said that, a VGA connection is fine for your second screen if it’s the only option you have remaining. It’s possible that your computer’s video card has just two ports, like this:

In that case, you’d connect your editing monitor to the white DVI port, and connect your secondary monitor to the blue VGA port.
It’s possible to buy adaptors that will plug a digital-connection screen into a VGA port in the computer, or vice versa. Remember that if you do this, you’re lowering your connection quality to the VGA level. Never do this for your main screen.
The control panel
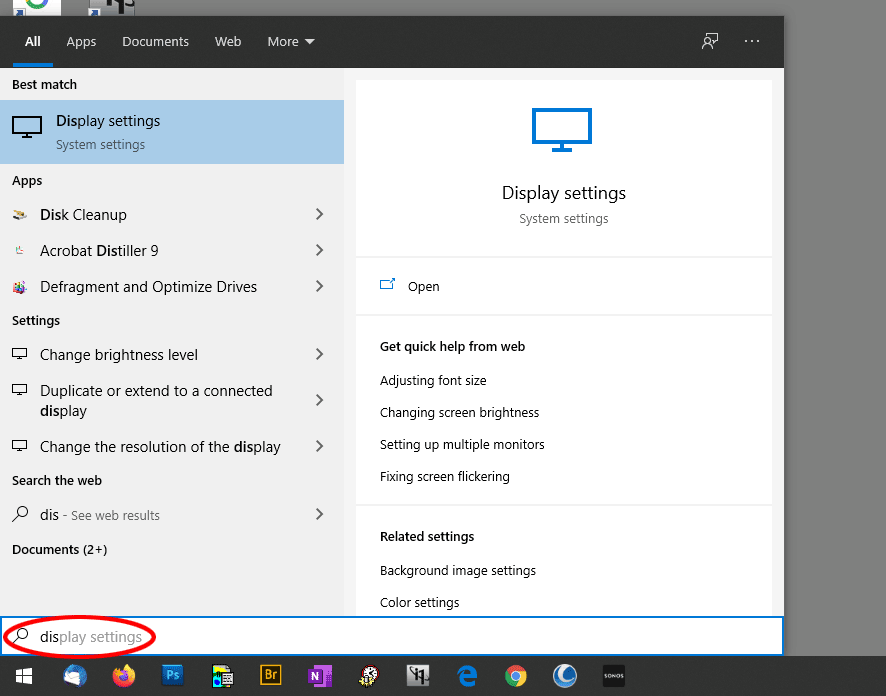
Once you’ve plugged in your two screens and booted up, hold down the Windows key and press S to get your search bar, then begin typing "Display" to access the Display Settings window:
When that window opens, immediately scroll down to the Multiple Displays area, and make sure it’s set to "Extend these displays":
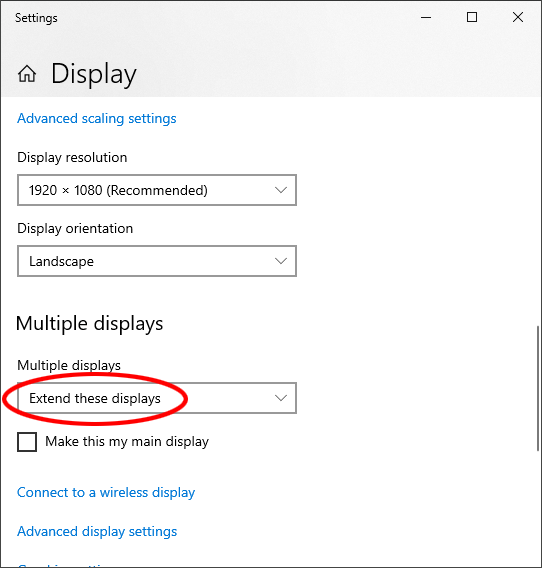
I cannot stress this enough. By default it will be on "Duplicate", but duplicating the screens is a very bad idea. For starters it ruins the benefit of having two screens worth of space in the first place. But more importantly, it ruins your calibration. You can’t calibrate both screens while duplicating; instead it will try to force one screen’s calibration profile onto the other screen, with inaccurate results. Your displays must be extended.
Next, scroll back to the top and hit the "Identify" button. That will briefly show you which is Screen 1 and which is Screen 2:
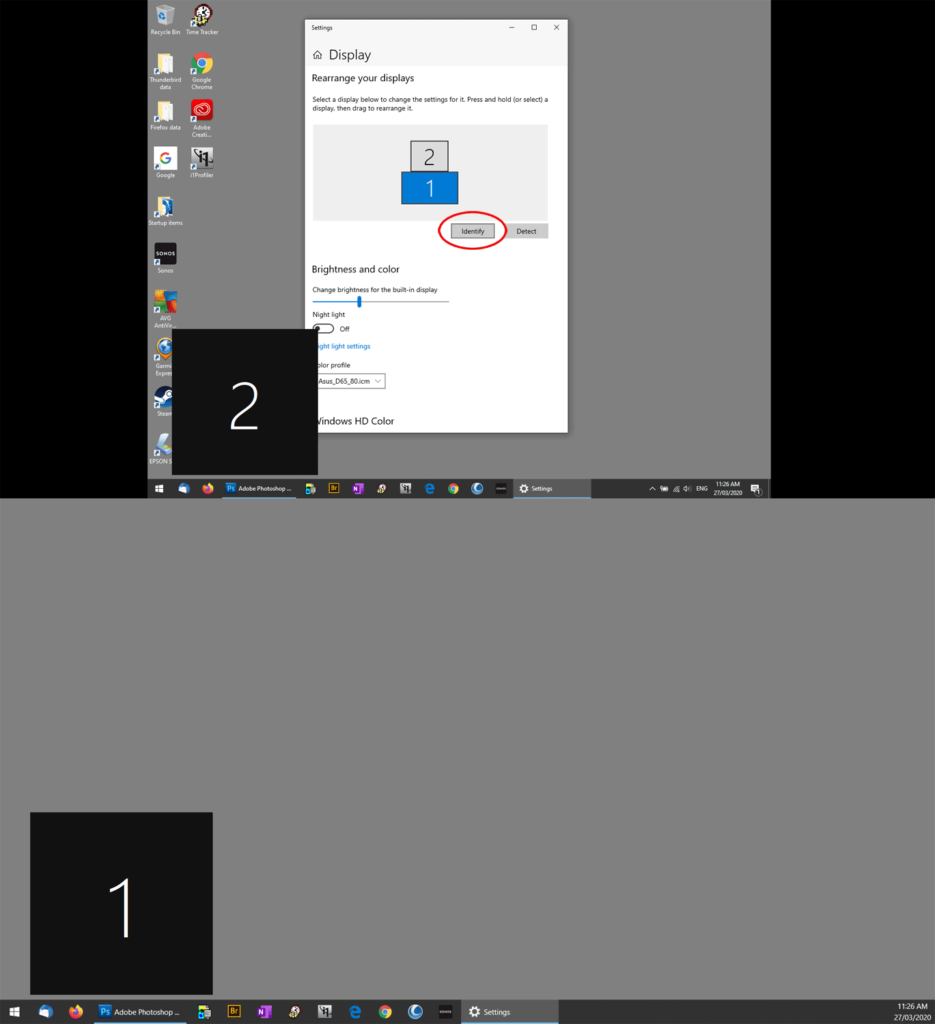
Now that you know which is which, you can arrange them properly. You see, by default Windows will assume that you have them side by side, and that Screen 1 is on the left and Screen 2 is on the right. But that won’t always be true! Depending on your desk and your needs, you could have them in any configuration. So click on each one and drag it to where it should be.
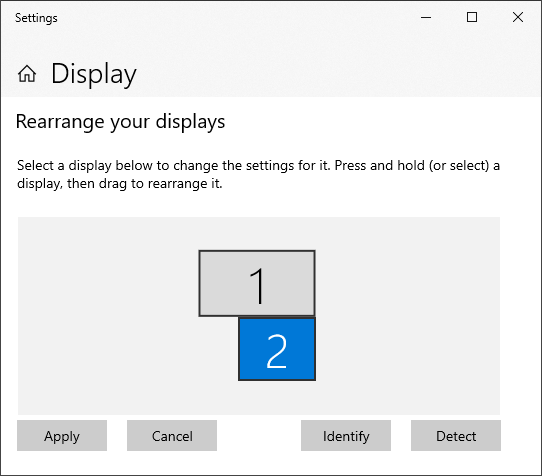
Maybe you’ve got Screen 2 below Screen one, and slightly off-centre:
Or maybe Screen 2 is actually a TV mounted on the wall to your left:
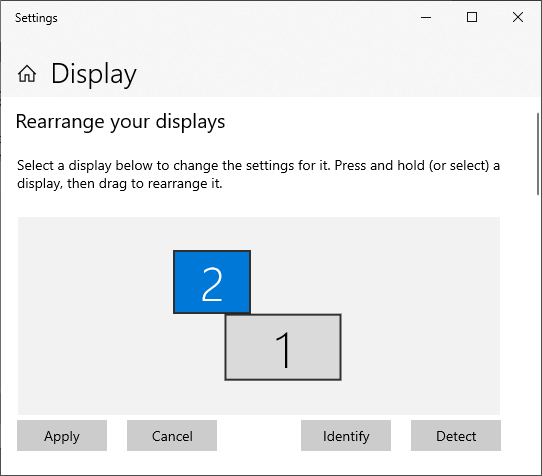
Or maybe you have a standard left-right configuration, but Screen 2 sits a bit higher than Screen 1:
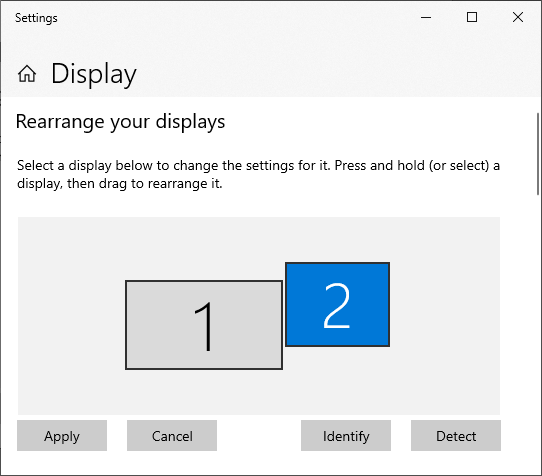
This positioning is important, because it allows your mouse pointer to move accurately between the screens. Once you’ve got it where it should be, press "Apply".
There’s one big problem that irritates me no end. Microsoft haven’t given us a way to tell it the physical size of the screens. It just reads the resolution of the screens, and assumes that the higher-resolution screen must be the biggest one. But that isn’t always the case, and in fact on both of my setups the physically smaller screen is the higher resolution one. In the above screenshots you can see that my Screen 2 is lower resolution, but actually it’s physically larger in size. This means that my mouse pointer doesn’t travel perfectly between the screens. It’s not the end of the world, but I wish Microsoft would address this.
Choose the main display
This gets a bit confusing, but stay with me. You have to tell Windows which is your "main display", by clicking on its thumbnail then scrolling down and checking the box:
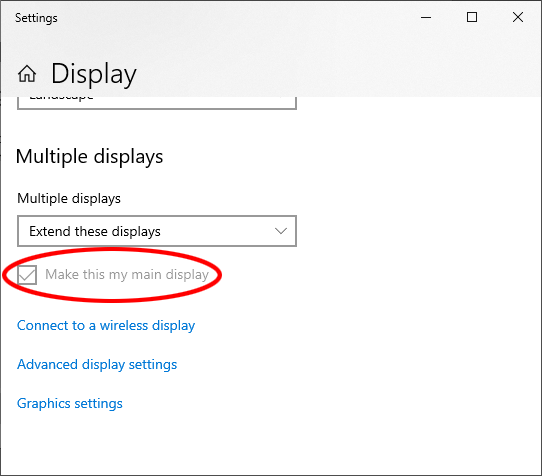
You’d assume than the “main display” will be your best screen – the one you’re going to edit on. And a lot of times that’s right. But you mustn’t choose your main display based on your editing. Your main display should be the one you browse the internet on.
This is because even though modern web browsers are colour-managed, some of them can only recognise the monitor calibration profile which is attached to the main monitor. If you browse the web on the second monitor, the browser might be trying to render colours using the wrong profile. So to be safe, make your web browsing monitor your main one.
This is different from Photoshop, Lightroom, etc. They recognise monitor profiles on all your screens. So you don’t need to edit on your main display if you don’t want to.
I hope this makes sense.
Other settings
You can click on each of the monitor thumbnails in turn, and address these settings:
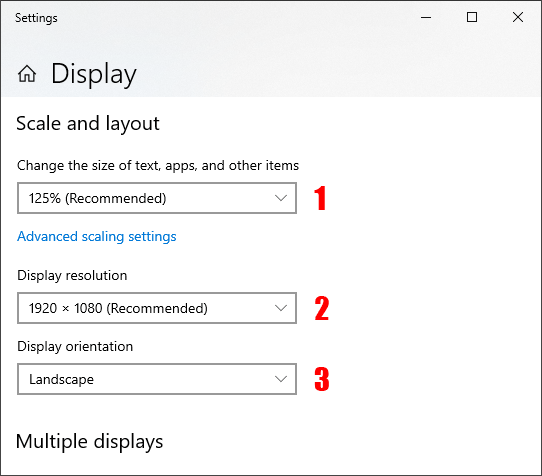
- Scale and layout. Generally we leave this at its recommended setting, but you’re welcome to play around with it to your taste.
- ALWAYS leave this at its recommended setting. Any change will make things blurry.
- Landscape is very normal for screens, but some can swivel around to be portrait orientation. This might suit your setup. If you’ve chosen portrait for one of your screens, tell Windows about it here.
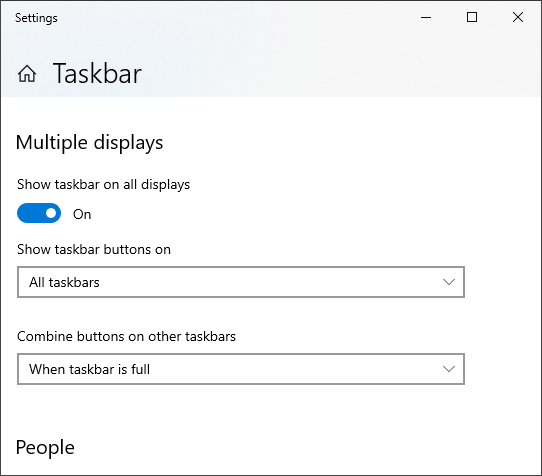
The taskbar
Now press the Windows-S again to get your search bar, and start typing "Taskbar settings":
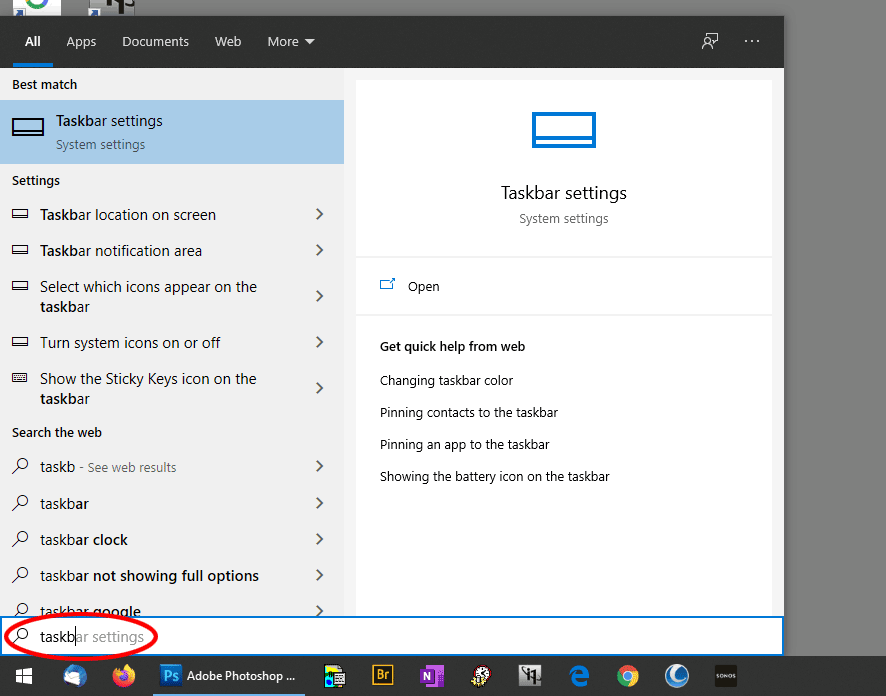
When the window opens, scroll down to the "Multiple displays" section. There are no rules about this bit. You can set it up however you like. I always prefer to have the taskbar and its buttons on both of my screens, but that might not suit you.
Calibration
Now go ahead and calibrate. Most modern calibrators allow you to do two or more screens, but the cheaper ones, such as the Spyder Express devices, only allow one. If that’s the case, of course you will calibrate the one you’ll be editing on.