Spyder5Elite calibration tutorial for desktop screens: Parts 1-5

This tutorial discusses using the Spyder5Elite to calibrate most desktop screens – that is, screens which have buttons and menus to control contrast, brightness and colour.
Before you begin, please make sure you’ve read this article.

Been here before?
If this is your first time running the Spyder5Elite using my instructions, keep reading this page. It’ll take you through the process step-by-step.
If you have successfully calibrated using my instructions in the past, and are here for a quick refresher about the monthly recalibration process, refer to this article on recalibration.
Part 1: Screen setup
Warm up
Make sure your screen has been turned on for at least fifteen minutes before starting this process.
Light
Make sure you’re in good light. Viewing prints in dim light is a futile exercise. It needs to be bright enough, and white enough. Read this if you haven’t already done so.
Reset to factory defaults (first time only)
When you’re getting ready to calibrate for the very first time, you need to search the screen’s menu to find the setting that puts everything back to its starting point. Every screen is different, so I can’t tell you exactly where to find this function, but trust me, it’ll be there somewhere. It might be called "Reset Screen Defaults" or "Restore Factory Settings", or something like that. You get the idea.
(When you’re doing subsequent monthly calibrations, this reset step shouldn’t be necessary. But never say never – some screens may need that "kick in the pants" each time, if they won’t recalibrate easily.)
Move the OSD
On some screens, the OSD (on-screen display, ie the menu) is right in the middle by default. That’s no good, of course, because that’s where the calibration needs to take place.
Somewhere in the menus will be the controls for the OSD’s position. Find them, and move it over to one side, or down into a corner.
Adjust brightness to match prints
Compare your prints to your screen, and adjust the screen’s brightness to get an acceptable match. Remember, don’t hold the print close to the screen – it must be out to the side, so you have to turn your head to compare.
Please don’t agonise over this brightness step. Near enough is good enough.
If you’ve never adjusted the brightness of your screen before, it’s likely to seem horribly dim to you at first. Don’t worry, you’ll be used to it in no time at all, and you’ll wonder how you ever tolerated it so bright before.
Choose best colour setting
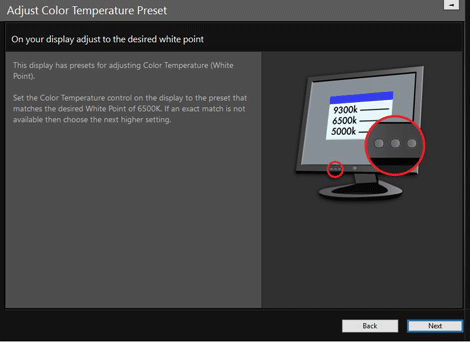
With your prints still in hand, it’s now time to find the best colour setting that your monitor offers. All monitors will have at least two or three colour presets – they’ll be called "Warm", "Normal" & "Cool", or "6500K", "7500K" & "9300K", or something like that. (Most will also have a "Custom" or "User RGB" setting, but we’ll try to avoid that complexity if possible.)
Pick the setting which matches your prints the best. If you’re in the lucky minority, you might find one that gives a really good match. But most of us simply have to accept the closest available setting, even if it doesn’t look perfect. Don’t worry, the calibration process will do the rest.
Check your lab’s website in case there are specific calibration instructions
This is quite rare, but it’s a good idea to check. You see, almost all labs adhere very sensibly to the modern calibration temperature standard of 6500K (sometimes also called "D65"). Sadly, however, there are some labs out there which still stubbornly cling to the 1990s standards of 5000K/D50 or 5500K/D55. Millers and Mpix are most notorious for this foolish setting.
So, check your lab’s website to see if they give specific advice in this regard. Most labs won’t mention it at all; in which case you can assume 6500K. Some labs will specifically say 6500K, which is great. If you happen to find that your lab specifies a different temperature, consider switching labs in the future, but for now, write down the number they advise. We’ll need it later.
You might be wondering why this matters. It matters because if your lab forces you to calibrate your screen to a too-warm colour temperature, it means that when you’re browsing the web, everyone else’s photos will look too warm to you, and your photos will look too cold to everyone else. Not good. 6500K is the web colour standard, and since the web rules the world, it is unavoidably the photography standard too. Most labs get this – Millers and Mpix do not.
Part 2: Install software
Calibrators no longer ship with disks. That’s fine, because the disks always used to be out of date before we got them anyway.
So when you open the box, the first thing you see is a notice to visit the DataColor website to download the software.
I don’t anticipate you’ll run into any problems during this process. You’ll be guided through download, installation, plugging in the device, entering the serial number, and activating the software. Finally, the software will tell you to plug in the device, then launch for you in readiness for your first calibration.
Part 3: Setup
If you’re running a dual-monitor setup, make sure you drag the Spyder software window onto the screen you’re wishing to calibrate.
Preferences
As soon as the software launches, choose Preferences:

Set the Recal warning for 1 Month, then click the Advanced Settings button:
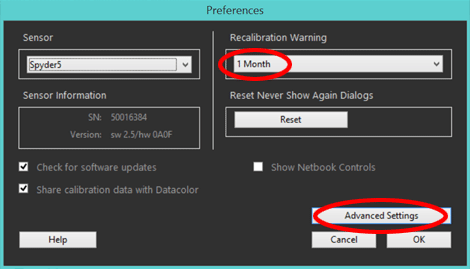
"Check for software updates" should be turned on by default. "Share calibration data" is up to you.
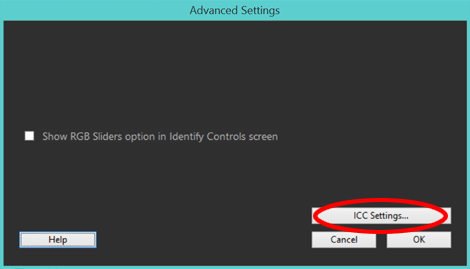
The "Show RGB sliders" box should remain unchecked. Click the "ICC Settings" button:
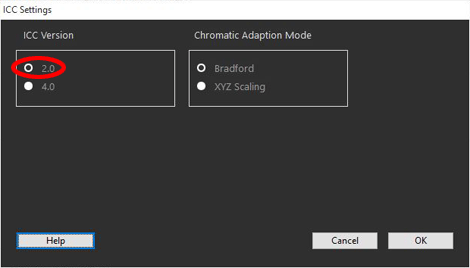
At the time of writing this, Version 4 profiles are still flaky. Make sure yours is set to Version 2:
Press OK a bunch of times to get back to the main welcome screen.
Check all four checkboxes, then press "Next" at the bottom right-hand corner of the screen to continue:
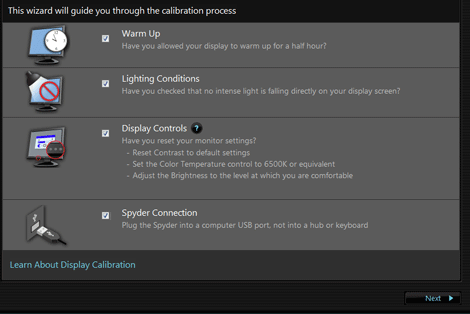
If this isn’t your first time running the software, those checkboxes might not even be there at all! It seems to only ask you to check them on the very first time. That’s weird, but whatever. Just press Next to continue.
Part 4: The Display
Depending if you’ve run this software previously, and how many screens you have, there are three options for what you might see next.
Option 1:
If you see this screen, choose Step-by-step Assistant and press Next:
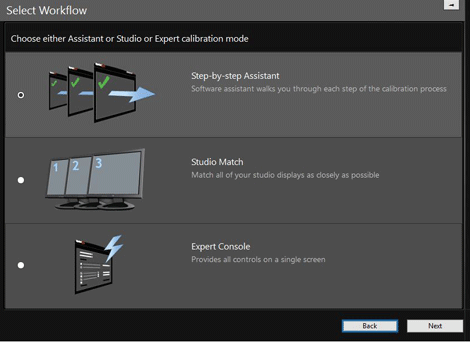
Then jump down the page to Part 5 to continue.
Option 2:
Or, you might see a simpler screen like this where you get to identify and name your monitor:
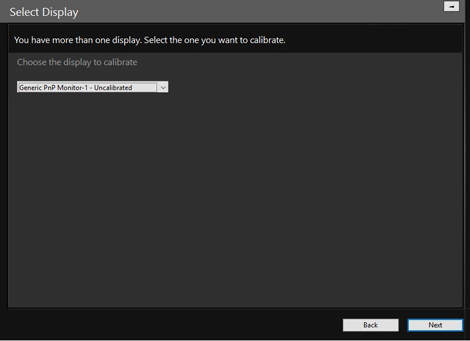
Depending on your setup, this little part of the process might look slightly different for you than it did for me. But it shouldn’t be complicated … it just asks you to give your monitor a name:
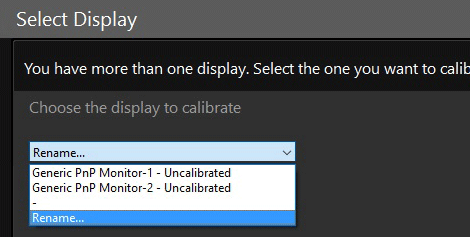

Option 3: (the most common option)
It might take you straight to the Display Type page. Needless to say, choose "Desktop" here:
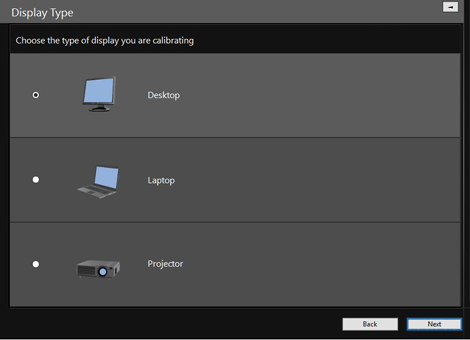
SPECIAL NOTE: On every screen, on the right-hand side, there’s a handy help panel. It’s great, and if you want even more in-depth explanation, you can click on the link at the bottom:

Their help really is helpful, I’m very impressed with it.
Make and Model
As far as I can tell, this screen is only relevant if you chose to share your calibration data with DataColor. Anyway, go ahead and enter your computer’s details:

Identify Controls
This is the part where you tell the software what your screen can and can’t do:
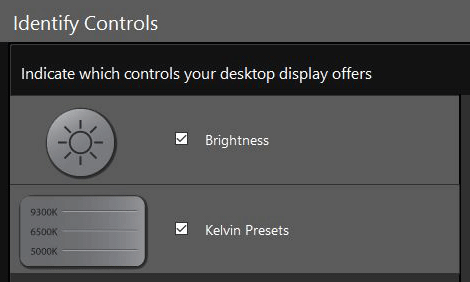
Again, yours might look different from mine here. That’s ok, just check the ones you have, then press Next.
Part 5: Calibration Settings
This screen is the hub of the whole operation:
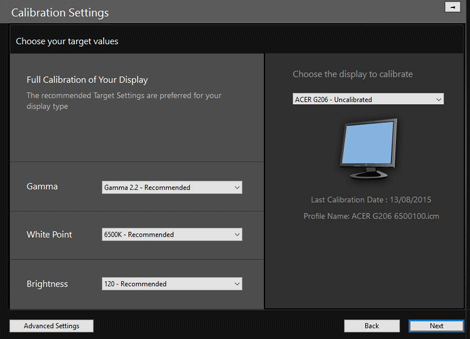
By the way, your screen might look different from mine. If yours gives you these three choices, choose "FullCal":

These three settings should (probably) look like this:
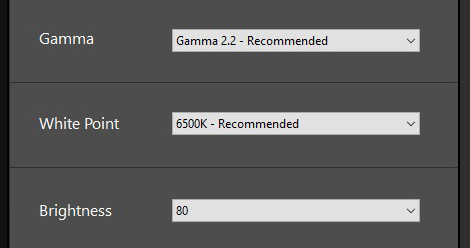
I said "probably", just in case your lab is Millers or Mpix or another foolish lab that doesn’t recommend 6500K for the white temperature (as I discussed in the first section at the top of this page). If your lab requires a different temperature, select it from that menu.
Gamma should always be 2.2, and Brightness can be 80 for now (we’ll tweak it later if needed). The software’s recommendation for 120 in the Brightness section is crazy – Datacolor seems to think people’s offices are lit by football stadium floodlights!
At the bottom of that screen, press the Advanced Settings button:

Advanced Calibration Settings
The first section summarises the settings you chose on the previous screen. The Room Light setting should be turned off, and the Gray Balance setting should ideally be on "Better".
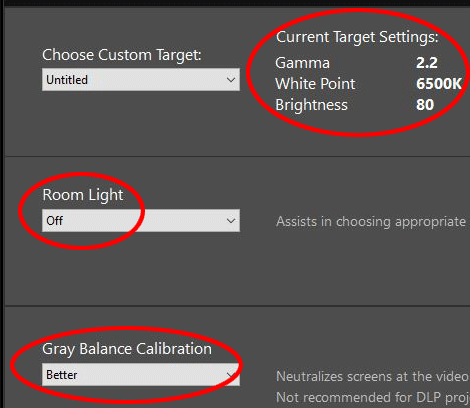
If you’re in a screaming hurry, "Faster" gray balance calibration might be adequate. But I hope you’ve allowed enough time to do this process properly.
The next screen asks you to set your monitor’s colour preset. I think this step comes too late in the process; that’s why I asked you to do it way back at the beginning, when you chose the one that most closely matched your prints. So don’t do anything here, just press Next:
