
Creating a fake blanket with texture
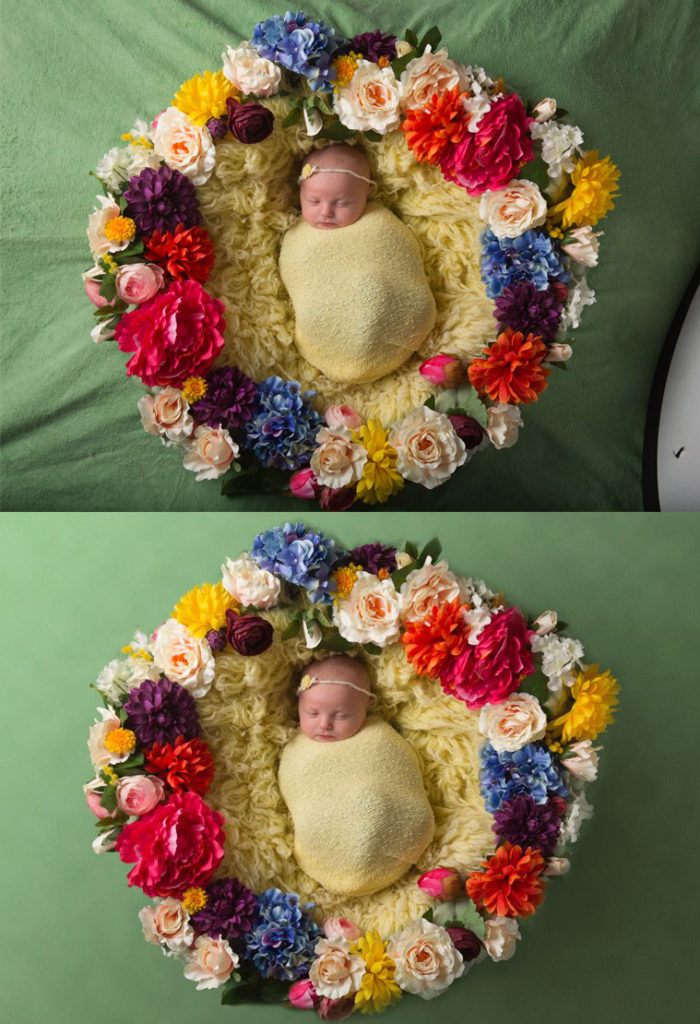
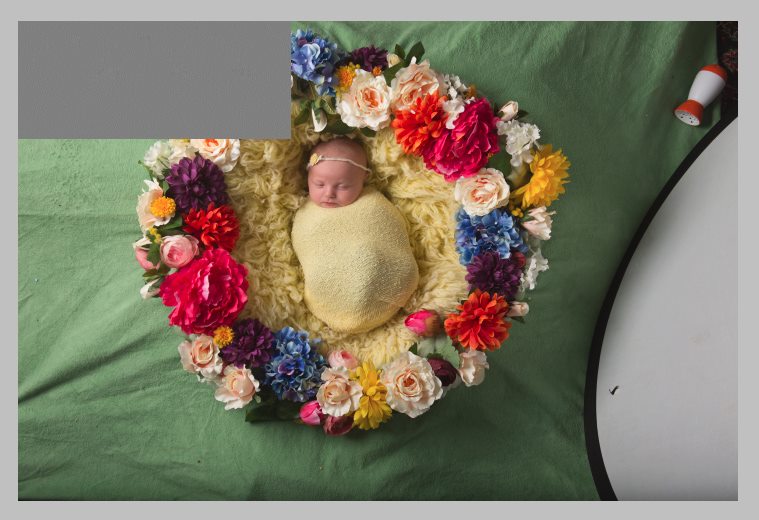
Josie from New Zealand had a photo with a wrinkled blanket. She said "I’ve tried replacing the whole background, blurring it, cloning it… it all looks stupid. Any other ideas?"
I was able to provide her with this fix:
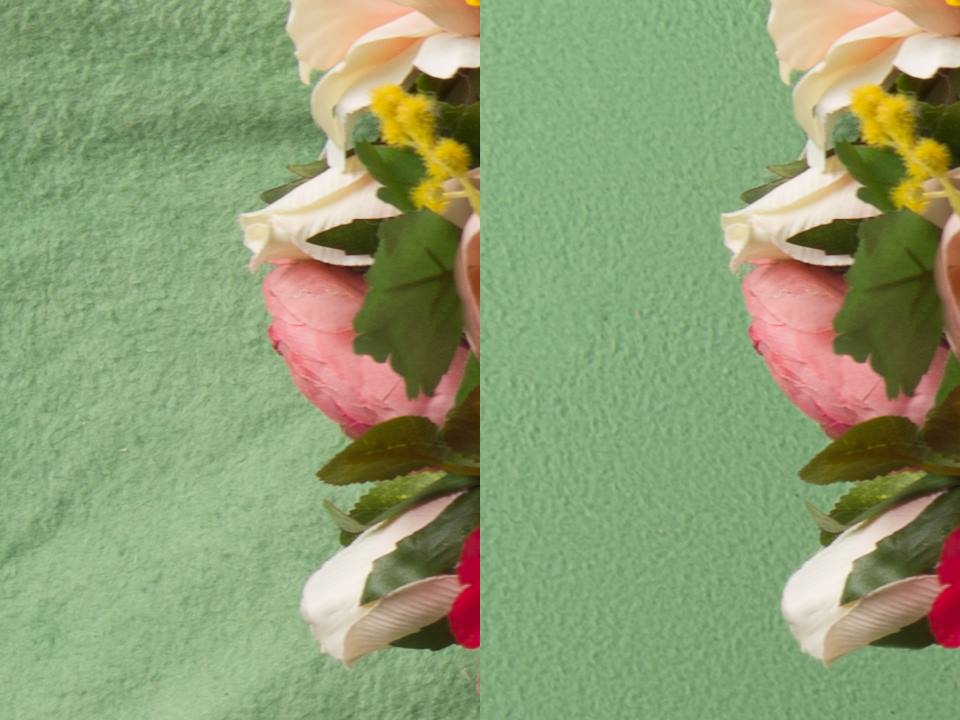
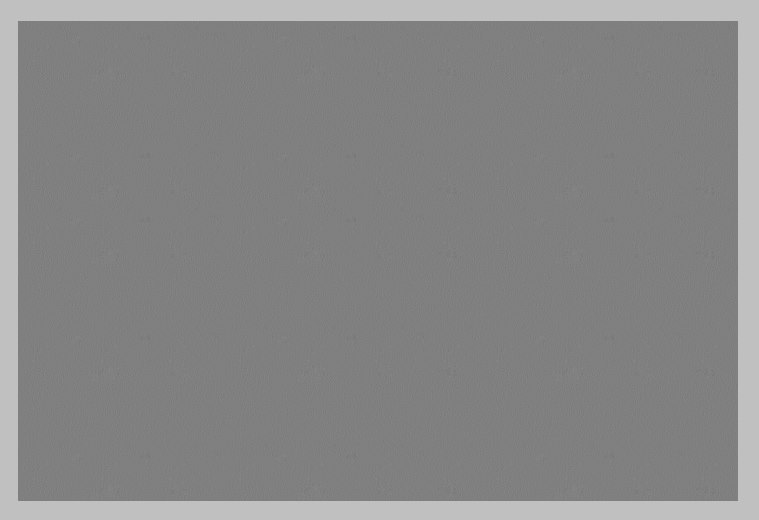
Viewing the whole photo at web size doesn’t show the texture, so here’s a closeup:
Essentially, this is a form of frequency separation. Here are the steps, as I explained to Josie …
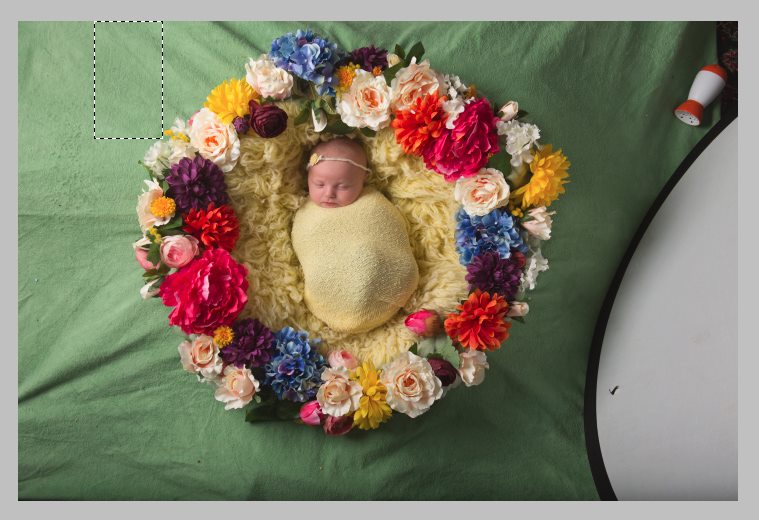
First, I used the marquee tool to select an area without too many wrinkles:
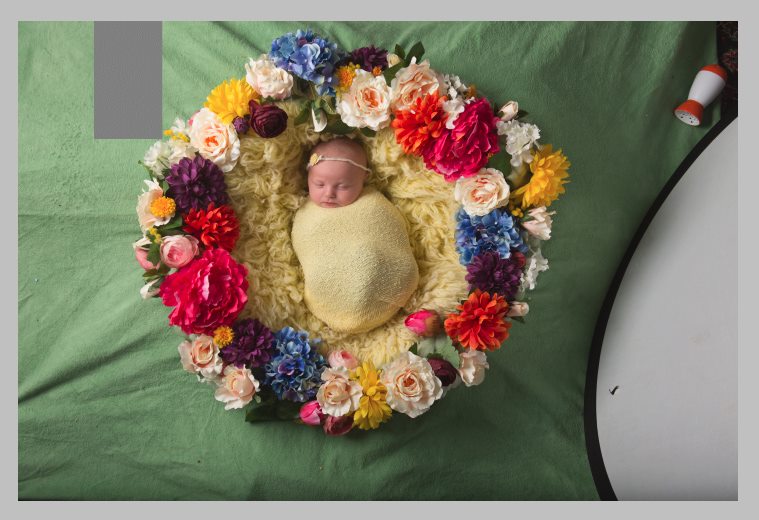
I Ctrl J’d to put that little section on its own layer, then zoomed in to 100% and ran Filter>Other>High Pass. I started with it at 0, and slowly raised the slider to achieve the texture I wanted. Not too small and grainy, but not too big and lumpy. I fear I’m not explaining that very well, but you’ll see what I mean when you try it.
The High Passed layer ends up looking like this – mid gray with the texture I wanted (which you can’t really see in this screenshot):
Then, I used the patch tool (clone or healing would have worked too) to clean up any little bits of unwanted specks and scratches. I just wanted clean, consistent (though of course naturally random) texture.
Then I moved that little section to the corner, and duplicated it, moved it across to beside that one, Ctrl E to merge it down, Ctrl J to duplicate it again, move it across, merge it, duplicate it … etc …
… until the entire space was filled with that texture:
Then I turned off that layer, and returned to the background layer. I added a gradient that was roughly similar to the overall colour of the blanket. I used this method. Then, the tedious part began – the masking.
As this was only a demonstration, I did it fast and rough, and even at this small size you’ll be able to see where I made some of the edges of petals fuzzy in my haste. But of course for a real photo you will need to zoom in and do it VERY precisely. This is the part that will take the longest. Work at at least 400% zoom, with a ~6px brush.
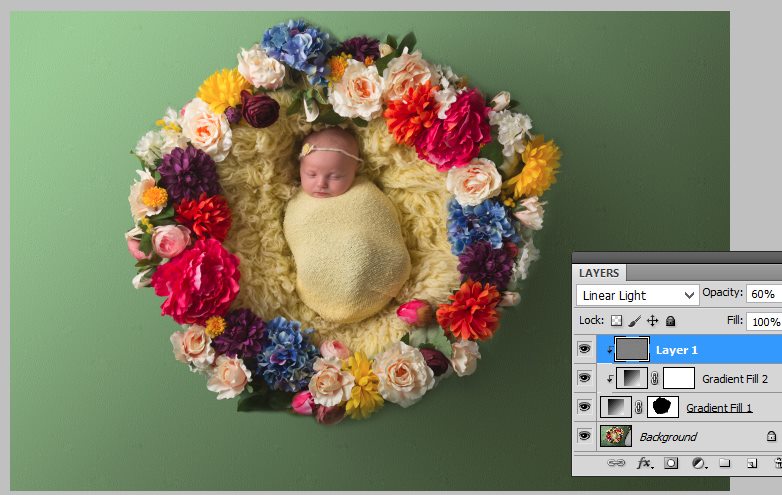
Then I turned the texture layer back on, clipped it to the gradient layers, and change its blend mode to "Linear Light":
At this point I zoomed in and examined the texture, and turned my layers on and off to compare my texture with the natural original texture. I lowered the opacity of the texture layer a bit (as you can see in the above screenshot), and I also decided my texture was a bit too sharp, so I applied a tiny bit of Gaussian Blur to the texture. Of course I was viewing it at 100% while I did this.
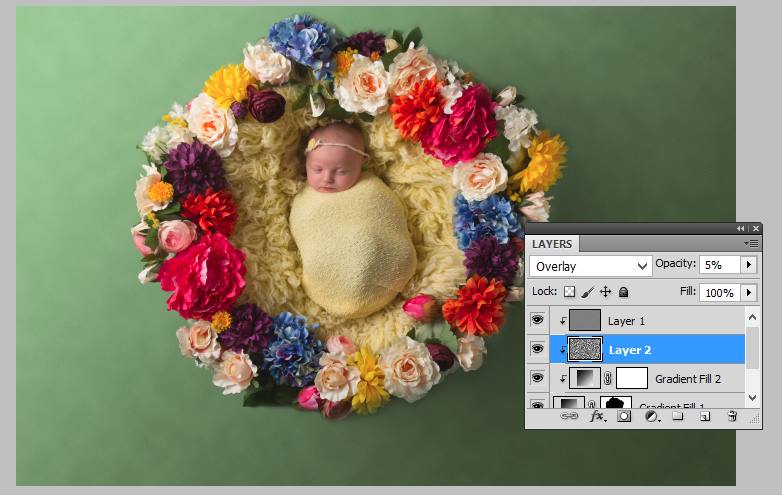
Then I had an afterthought. Would it look nicer if it was overall a tiny bit mottled? It’s easy to do, I added a new blank layer below the texture layer, pressed D to make sure my swatches were black and white, and ran Filter>Render>Clouds. I changed that layer mode to Overlay, and took the opacity WAY down:
I also demonstrated the Clouds filter method in this tutorial.
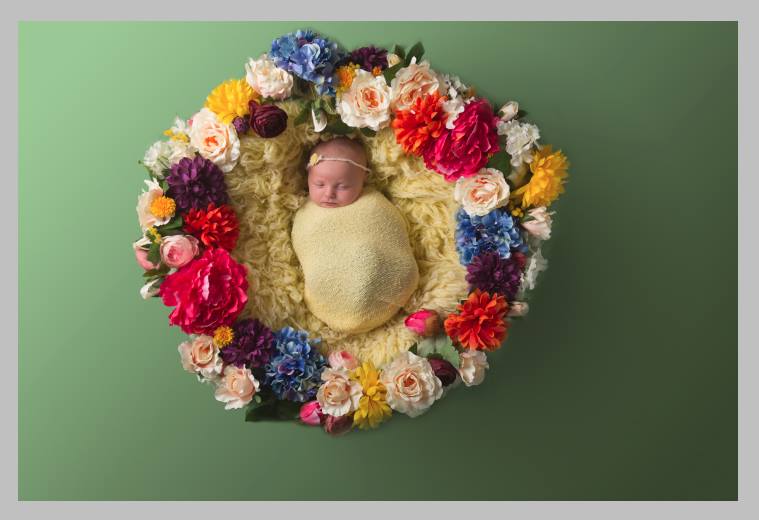
Here’s one more look at the before-and-after (remember, my masking was hasty):